.Htaccess files are Apache configuration files, allowing rules to be defined in a directory and in all of its subdirectories (which do not have such a file inside). They can be used to protect a directory with a password, or to change the name or extension of the index page, or to prohibit access to the directory.
- Interest of htaccess files
- Principle of htaccess files
- Prevent access to resources
- Protect a directory with a password
- Encrypt passwords
- Prevent access to a directory by a domain
- Prevent access to particular file
- Prevent a domain from accessing a file type
- Allow access to a group of files by a domain and a country
- Protect a directory with a login
- Force a user to meet at least one of the conditions
- Manage file types
- Add a Mime-Type to a Directory
- Force all files in a directory to a Mime-Type
- Set default file extensions
- Customization of error messages
- Change the default index file
Interest of htaccess files
The files .htaccess can be used in any virtual directory or subdirectory.
The main reasons for using .htaccess files are:
- Manage access to certain files.
- Add a mime-type.
- Protect access to a directory with a password.
- Protect access to a file with a password.
- Define custom error pages.
Principle of htaccess files
The .htaccess file is placed in the directory in which it must act. It thus acts on the permissions of the directory which contains it and of all its sub-directories. You can place another .htaccess file in a subdirectory of a directory already controlled by an .htaccess file. The .htaccess file in the parent directory remains in "activity" until the functionality has been rewritten.
The functionality of these files being very powerful, read this tutorial carefully before starting to create your own.
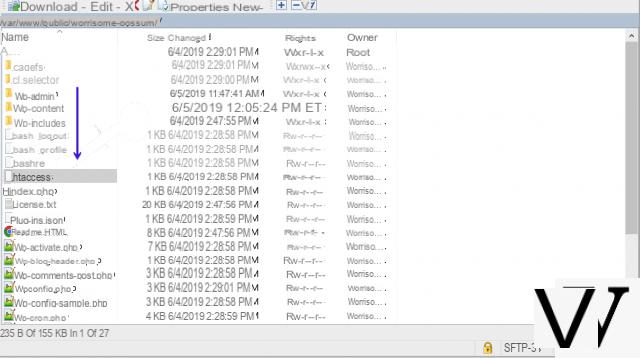
On Windows, it is logically impossible to create an .htaccess file, since Windows will not allow you to save the file as is. Here is the procedure to follow:
- Create a text file "file.htaccess"
- Rename the file by deleting "file"
Note: Depending on your editor, you can also save the file directly as .htaccess. In Notepad, it suffices to put quotes around the filename while UltraEdit manages the name itself.
Prevent access to resources
An .htaccess file is made up of two sections:
A first section contains the paths to the files containing the definitions of groups and users:
AuthUserFile /repertoire/de/votre/fichier/.FichierDeMotDePasse
AuthGroupFile /repertoire/de/votre/fichier/.FichierDeGroupe
AuthName "Protected access"
AuthType Basic
- AuthUserFile sets the absolute path to the password file.
- AuthGroupFile sets the absolute path to the group file.
- AuthName causes the Internet browser to display: "Type your user name and password." Domain: "Protected access" »
- AuthType Basic specifies that AuthUserFile must be used for authentication.
A second section contains the definition of access conditions:
Require valid-user
{access instruction to satisfy}
- require valid-user specifies that only identified people are allowed. It is also possible to explicitly specify the name of the people authorized to identify themselves: require user {username}
On Unix, the path to the password and group files looks like this:
/repertoire1/repertoire2/.../.FichierDeMotDePasse
On Windows, the path contains antislash (backslash) unlike Unix notation:
c: directory1directory2 .... PasswordFile
Protect a directory with a password
This is one of the most useful applications in the file .htaccess because it allows to define in a safe way (using a login and a password) the access rights to files by certain users. The syntax is as follows:
AuthUserFile {location of the password file}
AuthGroupFile {location of group file}
AuthName "Protected access"
AuthType Basic
Require valid-user
The AuthUserFile command is used to define the location of the file containing the logins and passwords of users authorized to access a given resource.
The AuthGroupFile command is used to define the location of the file containing the user groups authorized to identify themselves. It is possible to override this declaration by declaring the following file: / dev / null.
Here is an example file .htaccess :
ErrorDocument 403 http://www.Idroid.com/accesrefuse.php
AuthUserFile /repertoire/de/votre/fichier/.FichierDeMotDePasse
AuthGroupFile / dev / null
AuthName "Secure access to the CCM site"
AuthType Basic
Require valid-user
The password file is a text file that must contain on each of its lines the name of each user followed by a colon (:), then the password encrypted (recommended solution) or in clear.
Here is an example of an unencrypted password file (here .PasswordFile)
JFPillou:Toto504
Damien:Robert(32)
Comma:Joe[leTaxi]
Here is the same file with encrypted passwords:
JFPillou:$apr1$Si0.....$teyL5Y7BR4cHj0sX309Jj0
Damien:$apr1$TD1.....$sfPTHjoufoNsda4HsD1oL0
Paragraph: $ apr1 $ zF1 ..... $ wYKqRu2aVYlAEQnxVkly8.
.FichierDeMotDePasse is a simple text file containing the names of the users followed by: then the encrypted password (or not) of this user. This password file should not be put in an Internet virtual directory (but what can we do otherwise if we do not have an Internet server and our site is hosted by a third party?). It is also necessary to take the precaution of mixing upper case letters, lower case letters, numbers and symbols in the name of the file ...
Encrypt passwords
Apache provides a tool for easily generating encrypted passwords (both under Windows and Unix), it is the htpasswd utility accessible in the bin subdirectory of Apache.
The syntax of this utility is as follows:
- To create a new password file:
htpasswd -c {path to password file} user
- To add a new user / password to an existing file:
htpasswd {path of password file} user
The password will be requested on the command line with a confirmation.
Here is an example :
htpasswd -c /www/secure/.htpasswd JFPillou
Here is a small utility allowing you to encrypt your passwords online:
- https://hostingcanada.org/htpasswd-generator/
Prevent access to a directory by a domain
The syntax for blocking access to a directory by a domain is as follows:
Allow (all, [domain list])
Deny (all, [domain list])
Order (Allow,Deny or Deny,Allow)
Order Deny, Allow
Deny from ..LeNomDuDomaine.com
All the people (requests) coming from the domain .LeNomDuDomaine.com will not be able to have access to the resources included in the directory and its sub-directories. The Order command is used to explicitly specify that the Deny command will indeed cancel the effect of Allow and not the other way around.
Here is an example of an access restriction:
ErrorDocument 403 http://www.Idroid.com/accesrefuse.php
AuthUserFile /repertoire/de/votre/fichier/.FichierDeMotDePasse
AuthGroupFile / dev / null
AuthName "Secure access to the CCM site"
AuthType Basic
order deny, allow
deny from all
allow from 193.48.172.2
require user JFPillou
In this case, access will only be possible for the JFPillou user from the IP address 193.48.172.2 and with the correct password.
Prevent access to particular file
By default, Apache applies the restrictions of the .htaccess file to all files in the directory in which it is located as well as to all files contained in its subdirectories.
It is also possible to restrict access for one or more files in the directory using the tag.
Here is an example of restriction to the admin.php and admin2.php files:
AuthUserFile /repertoire/de/votre/fichier/.FichierDeMotDePasse
AuthGroupFile / dev / null
AuthName "Secure access to the CCM site"
AuthType Basic
require user JFPillou
AuthUserFile /repertoire/de/votre/fichier/.FichierDeMotDePasse
AuthGroupFile / dev / null
AuthName "Secure access to the CCM site"
AuthType Basic
require user JFPillou
You must use only one tag per file. Otherwise, the following error is reported in the error log file:
.htaccess: Multiple arguments not (yet) supported.
For information, it should be added that since Apache 1.3, it is advisable to use the tag instead of the tag. This new tag also supports only one argument but we can process several files thanks to a regular expression.
Prevent a domain from accessing a file type
Order Deny, Allow
Deny from .LeNomDuDomaine.com
All the people (requests) coming from the domain .LeNomDuDomaine.com will not be able to have access to the images, whose extension is .png, included in the directory and its sub-directories.
Allow access to a group of files by a domain and a country
Order Allow, Deny
Deny from all
Allow from .phpspain.com
Allow from .com
All people (requests) coming from the .phpspain.com domain or from domains ending in .com will be able to access files starting with php (for example, the phpbonjour.html, phpaurevoir.vxf files) included in the directory and its sub - directories.
Protect a directory with a login
This method (much less secure than the previous one) allows low-level authentication only by the name of the user. The syntax is as follows:
Require (user [list of users], group [list of groups], valid-user)
Here is an example line from the .htaccess file:
Require User Damien Comma PumpPHP Jeff Rastapaye
Any user wishing to enter the directory or one of its sub-directories will be refused unless he identifies himself by giving a name appearing in the list.
Force a user to meet at least one of the conditions
Here is the syntax:
Satisfy (any, all)
Order Allow, Deny
Deny from all
Allow from .comee.com
Require User Damien Comma PumpPHP Jeff Rastapaye
Satisfy Any
This means that access to the directory will be blocked for everyone except people who identify themselves and requests from the domain .comee.com.
Manage file types
A MIME type is a set of standard file types, allowing a given file extension to be associated with an application, in order to automate the launch of the application.
Add a Mime-Type to a Directory
The syntax is as follows:
AddType (mime/type [liste d'extension])
Here is an example of the implementation of the file .htaccess :
AddType image/x-photoshop PSD
AddType application / x-httpd-php .php
AddType application/x-httpd-php .htm
The server will send the file to the Internet browser, telling it to launch the PhotoShop program (if it is installed on your machine) and give it the file.
Usually this is used for files requiring a particular plug-in not recognized by your browser.
This command also allows you to cancel any predefined element. So you can save a .wav file with a .gif extension and tell the browser to consider .gif files as audio files!
In practice, we can therefore use this command to order PHP to parse other file extensions, .htm for example.
Force all files in a directory to a Mime-Type
Here is the syntax to adopt:
ForceType (mime/type)
For example with the following line, all the files in the directory containing the file .htaccess will be considered as .jpg files regardless of their extension:
ForceType image/jpg
This type of control cannot be used in the terminals!
Set default file extensions
The syntax to follow is:
DefaultType (mime/type)
For example
DefaultType text/html
This option allows you to define the default behavior of the browser when dealing with extensions that are unknown to it.
Here it will take any unknown file (eg 'hello', 'Rastapaye.phpspain') as HTML document.
Customization of error messages
This is a practical feature because it allows you to define a default page for a given type of error (See all the error codes and their meaning) ...
This allows on the one hand to guide the user instead of displaying the banal browser error page, as well as to brighten up the navigation even in the event of an error.
ErrorDocument (3-digit-code [file name or text or url])
The following two lines are used to define custom error pages in the event that access to a document is prohibited or the document does not exist:
ErrorDocument 403 /erreurs/403.php
ErrorDocument 404 /erreurs/404.php
This allows you to give a custom error message replacing the files supplied with the browser.
Here are some of the most common mistakes to customize:
- 401 Unauthorized: The person did not pass the identification successfully.
- 403 Forbidden: the server does not have the right to respond to your request.
- 404 Not Found: The server could not find the desired document.
Change the default index file
The index file is the file that is displayed when no file name is defined in the URL (for example http://www.monserver.com/directory). This prevents the browser from listing all the files contained in the directory (for confidentiality reasons).
The syntax for performing this type of operation is as follows:
DirectoryIndex (files)
Here is an example implementation:
DirectoryIndex index.php index.html index.phtml /erreurs/403.php
When you try to access the directory without specifying the page to display, Apache will use the DirectoryIndex directive. Usually, by default, this directive points to index.html then index.htm.
In the example above, Apache will start by looking for index.php, then index.html, and then index.phtml. If none of these three files exist, the 403.php page (located in the root) will be displayed to avoid listing the directory.
Tutorial written by Jean-Espagnol Pillou and Douglas Six


