The latest iPhone models possess a camera to scream that allows you to take pictures of the highest quality. Being of high quality, Apple has created a new format (.heic) that allows you to compress these photos a little and save space otherwise not even 64GB of internal memory would be enough for those who love to take photos continuously.
Who owns so many photo in memory of the iPhone, however, tends over time to save and copy them also on the computer, where it is easier to store them or eventually print them. But how copy photos from iPhone to Windows? Below we see all the possible ways, without using iTunes which is known to all as the first source of trouble, in the sense that it often generates the deletion of data on the device.
# 1. Copy Photos from iPhone to Windows with TunesGO
As a first method we recommend using TunesGo. This program is truly exceptional when it comes to data management, not only for iOS devices but also for Android devices. With it you will be able to copy and transfer photos from iPhone to Windows PC (or even Mac) both selectively and totally. No waste of time, no risk of photo deletion and above all ease of use!
We have actually already seen this program at work in the guide on how to transfer photos from iPhone to PC and Mac, but we want to take it up again below.
To get started download the free demo version for Windows (or Mac):


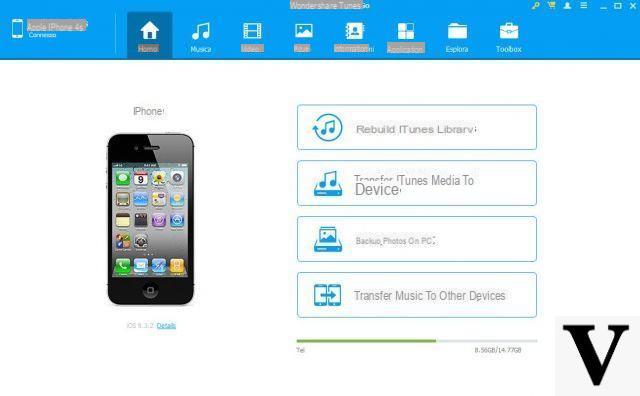
Step # 1 Connect the iPhone to the PC using its USB cable and launch TunesGO
Step # 2 From the main program screen click on "Backup Photos to PC”If you want to save and copy ALL photos to your computer

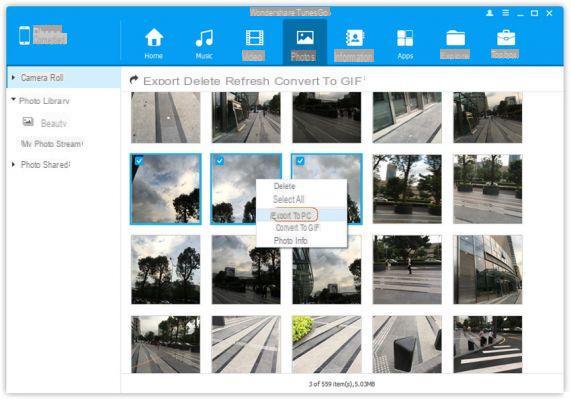
Step # 3 If you want to save the photos selectively, click on the tab at the top PHOTO
Step # 4 From the window that opens you can select the albums (from the menu on the left), and choose the photos to export to your computer.

Step # 5 Click on the "Export " followed by "Export to PC".
Whether you want to copy all of the photos or just a few, this is an incredibly simple method to follow and in less than a minute you can finish the process.
# 2. Copy photos from iPhone to Windows 10 manually
Not everyone is interested in using a third party program like TunesGo, however, the only alternatives available are to use iTunes or the default functionality present in Windows. Below we will show Windows 10 users how to use the built-in features to transfer their photos from an iPhone to their PC.
Step # 1 Make sure you have iTunes installed on your computer. Then connect the iPhone to the PC via USB
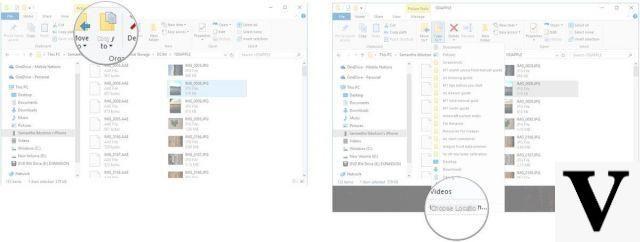
Step # 2 A window will open "Windows Explorer"And through the menu on the left click on" This PC "
Step # 3 The connected device will be shown as an external disk. Double click to access and then click on the folder "DCIM"

Step # 4 The photos stored on your iPhone will be displayed. Select all the photos you want to transfer. Use the key CTRL to select multiple photos.
Step # 5 Click with the right mouse button and then click on "Copy".

Step # 6 Create a folder on your desktop, where you can copy all the photos.
# 3. Copy Photos from iPhone to Windows 8 PC
Just like with Windows 10, if you have Windows 8 installed on your computer, there are built-in features that allow you to copy photos from an iPhone to your computer. Here are the steps to follow.
Step 1 - Connect your iPhone to Windows 8 PC using a USB cable.
Step 2 - Once your iPhone has been detected by the PC, a “Windows Explorer” window opens and here you will need to click on the “This PC” option from the left menu.
Step 3: Right click on your iPhone and click "Import images and videos".
Step 4: The iPhone will be scanned and once the scan is complete, select the “Review, organize and group objects to import” option.

Step 5 - At the bottom left of the window, click on "Other options”And select a location to save the photos. Click on "NEXT"To proceed.
Step 6 - You will now be able to view all your photos. Select the photos you want to transfer.
Step 7 - Finally, click on the button "Import”And after a few minutes, you will be able to find your photos in the designated storage folder.
Unlike Windows 10, you don't need to have iTunes installed. So it's easier to use this built-in feature than Windows 10.
# 4. Copy Photos from iPhone to Windows 7
The last method in this article is about how to transfer photos from iPhone to Windows 7.
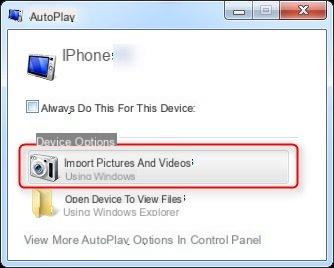
Step 1 - Connect your iPhone to PC, and once it is detected, an AutoPlay window will appear.
Step 2 - From this window, click on the option "Import images and videos".

Step 3 Then click on "Settings" and click on the album on "Camera Roll".
Step 4 Click on "OK" and all the photos will be transferred to the PC.
Copy Photos from iPhone to Windows 10/8/7 (iPhone 12/11 / X / 8 included) -


