Here are the different steps that allow you to create your own webradio for free.

Our video
Loading your "FAQ: Create a WebRadio" videoCreate your own server
That is to say, host the webradio on your computer, with your internet connection. This requires a fairly high upload speed if you do not use a sponsor such as listen2myradio mentioned below. Thanks to it you will send the feed to the sponsor (so it will mean pulling on the connection about 20-25kb upload) which will allow you to have a maximum of 5000 connections, which is huge for free .
Shoutcast
Almost the same system as Ice cast.
Description
- It is a free way that allows you to host Internet radio from your pc thanks to Winamp and Shoutcast.
- The Quality and the number of plays depend on your connection. Which can hinder your ambitions quite a bit.
- You will benefit from appearing in Shoutcast's internet radio search engine, which can get people to your channel faster.
- A WEB page (http ... IP + Port) will be dedicated by Shoutcast to administer and obtain information.
- The titles of the songs and the mixes will appear through Winamp thanks to the TAGs of your songs, so remember to name them correctly and know that you have software like MP3TAG which makes the job much easier.
Setting up the V1
Here are the elements needed to design our Webradio:
- Winamp player
- A server console
- DSP plugin
Download V1
We will have to download three programs:
- Winamp.
- Shoutcast Plugin DSP for Windows 32bits, 64bits, Linux and Mac., At the bottom of the page 2.3.5. Notes on the last update (http://forums.winamp.com/showthread.php?t=372044%29
- Please note that the server console has 2 versions, an old one that some users have but which is no longer available for download, and a more recent one that we will also deal with (2.4).
Install the V1
First :
- Install Winamp, you can uncheck the following options.
Secondly :
- The DSP Plugin you will find in the Winamp Preferences in Effect / DSP and you will see "Nullsoft Shoutcast Source DSP".
And the third:
- Shoutcast's "sc_serv" server console.
Configure the V1
Open the Shoutcast folder (on Windows Seven 64 bits):
C: Program Files (x86) SHOUTcast
Open sc_serv.ini. If you are using Windows Notepad the code display is unreadable, prefer to use Notepad ++ for an airy and colorful display.
Find and modify the following parameters:
MaxUser = 10
Password = Your password.
Test your port, it must be open for the firewall as well as for the router. Otherwise it's more complicated because you have to redirect the port in the NAT settings of your router.
PortBase = Your port, by default 8000 (in the example I used a port already open on my box and the firewall, port: 51601).
For this, please activate it, that is to say remove the ";" because it is in the comments and removing the space and the semicolon allows you to activate your relay IP (Web IP not Local).
To find your internet IP and not local, several methods.
RelayServer = xx.xx.xxx.xxx
Configure the DSP Plugin:
- Open winamp and the DSP plugin.
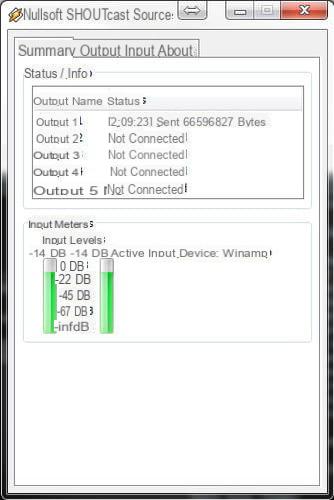
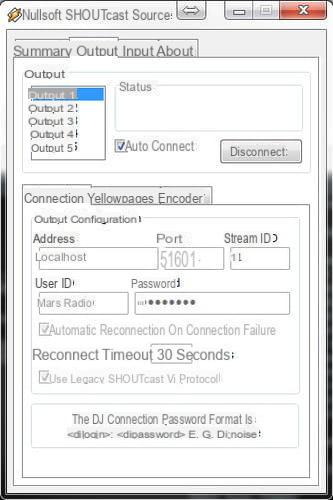
- Configure the port if it has been changed as it is in the "sc_serv.ini" file.
- Cocher " Use legacy SHOUTcast V1 Protocol ".
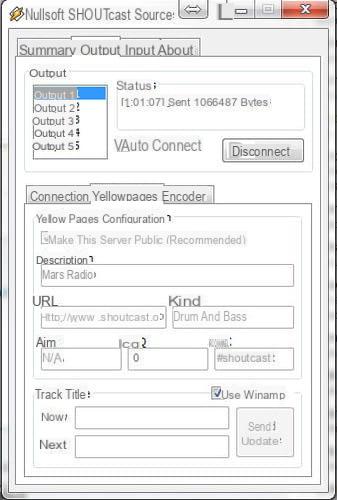
- In the Yellowpages tab, check if this is not already the case "Make this server public (recommended)" as well as the "Track Title" box if you want Winamp to manage the names to send them to the server.
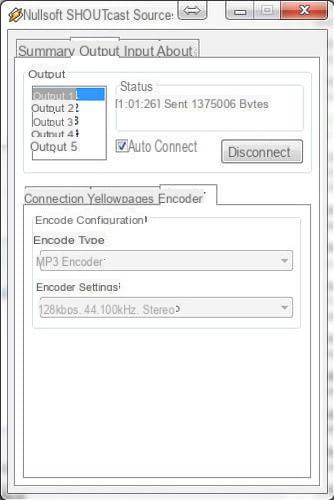
- In the Encoder tab choose "MP3 Encoder" and select 128kbps, 44.100kHz, Stereo.
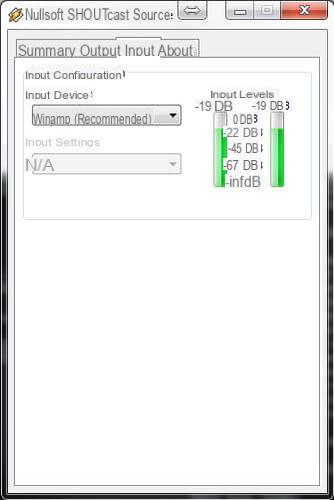
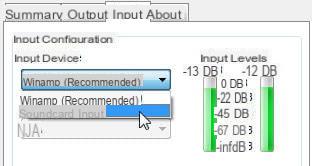
- Input tab, leave on recommended if you want this to be the input to winamp, it will not work live. If for example you have turntables and you want to play live you must select the input of the sound card.
- If you don't have a fixed IP, you can use No IP to get dynamic DNS and URL redirects (otherwise it's prettier as an address than the IP directly but it's mostly for those who have a dynamic IP.)
Use the V1
- Winamp must be open and the DSP plugin connected.
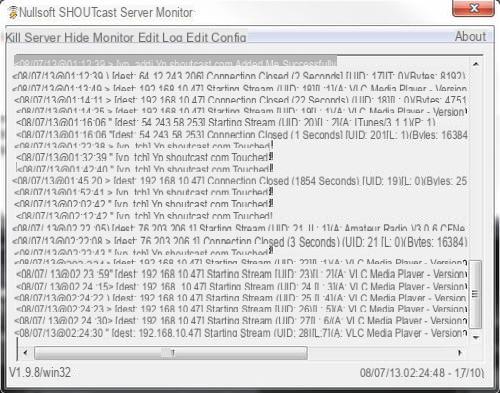
- Start the server console:
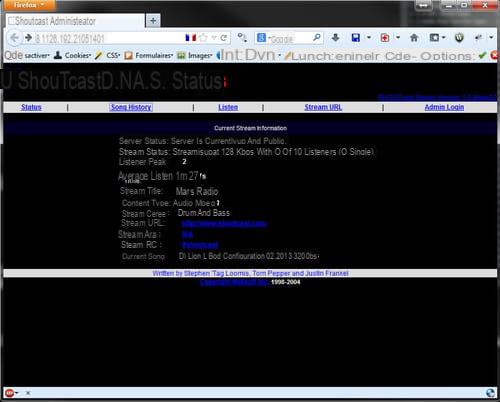
- In your browser enter http: // IP: port and there you will access the information page of your radio.
- Click on "listen" from another PC or locally (locally this will not test the internet).
- The server console must display a connection (at the bottom right of the server console there is the number of people connected to your WebRadio.)
- Go to Shoutcast and search for your radio, be careful it only appears after a certain time (10 to 20 minutes.)
Setting up the V2
As for the old version we need the same programs, but this time all are available on the official site.
- Winamp player
- A server console
- Plugin DSP the last one.
Download V2
You will need to download three programs (refer here):
- Winamp.
- Shoutcast Plugin DSP for Windows 32bits, 64bits, Linux and Mac., At the bottom of the page There is 2.3.5. Notes on the latest update (http://forums.winamp.com/showthread.php?t= 372044% 29
- SHOUTcast DNAS 2.0 32-bit et SHOUTcast DNAS 2.0 64-bit
Install the V2
First :
- Install Winamp, you can uncheck the options and options.
Secondly :
- The DSP Plugin you will find in the Winamp Preferences in Effect / DSP and you will see "Nullsoft Shoutcast Source DSP".
And the third:
- Shoutcast's "DNAS v2 server" console.
Configure the V2
Open the Shoutcast folder (on Windows Seven 64 bits):
C: Program Files (x86) SHOUTcast or other installation folder containing the Shoutcast folder, and open the folder.
- edit with notepad ++ preferably, the "sc_serv_basic.conf" file and change:
portbase = 51601, password = password, adminpassword = admin password.
Use the V2
- Winamp must be open and the DSP plugin connected.
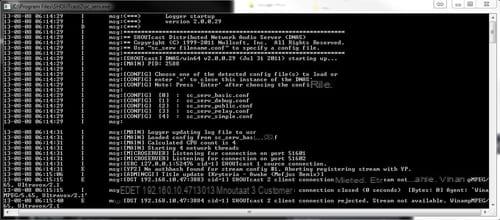
- Start the server console: by clicking on the "sc_serv.exe" file.
- In your browser enter "http: // IP: port" and there you will access the information page of your radio, for example http://xx.xxx.xxx.xxx:port/
- Then http: // IP: port / to administer the radio, you need the name and password edited in the configuration file.
- Click "listen" to listen.
- you can configure so that the radio is public and appears in the Shoutcast search engine.
- The server console should display the connections.
- Go to Shoutcast and search for your radio, be careful it only appears after a certain time (10 to 20 minutes.)
- If you have connection problems it is probably because of the firewall, of the router (in this case, you must configure the NAT port routing of the port of your WebRadio).
- In case of problems with the server or the configuration, refer to the listen2myradio part, this will prevent you from being restricted by the connection. That's 5000 listeners at 128kbps not 10 clients, which is more interesting. It also avoids configuring the server because even if it has to be done, it is much easier.
Caution
- Files encoded with the lame MP3 codec may cause concern when they are broadcast depending on their version. it is best to encode the files with the FHG (Guess) codec. otherwise the sound can work from the player but not from the radio, the sound will be choppy completely. Free Audacity does this very well as does Sound Forge. Beware of dbpoweramp which exports in non-compatible blade as well as of some classic encoder software.
Dissemination methods
- You can broadcast through the player by loading "playlist" in .pls or .m3u format as well as your audio formats supported by the player such as mp3, ogg, wav etc ... But you can also go directly through your sound card, like to mix with vinyl turntables in "Live" for example ...
Live
- Change the following parameter to " sound card input "(Input in general):
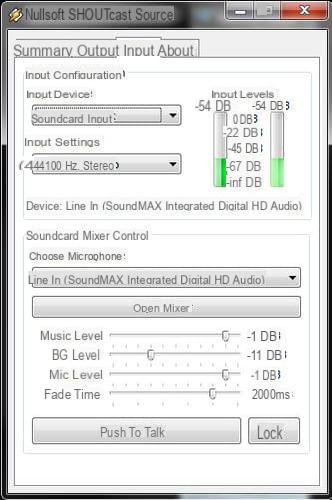
- Once the sound card input device has been configured, all you have to do is adjust the settings, and take advantage of the "Push to talk" which allows you to speak live on your radio and which you can also block.
With the player
- Just leave the settings as recommended and the player will be activated.
VirtualDJ Home Free
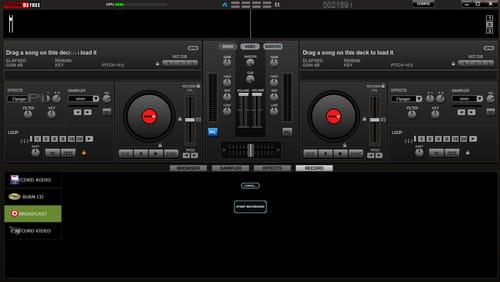
- You can use VirtualDJ for your Webradio.
- Download it here.
- Install and go to the "reccord" tab
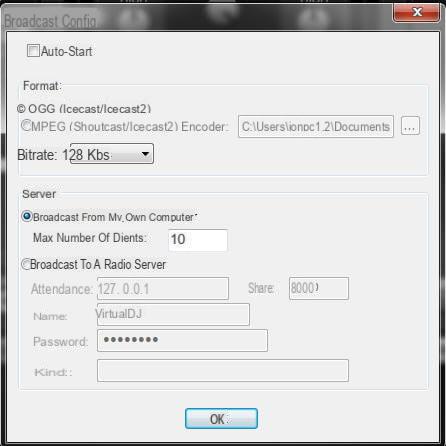
- Then configure in 128kbps 10 users.
- Click on "start"

- To listen to it, nothing could be simpler, everything is indicated. Http: //ip+port/VirtualDJ.ogg
By lodging
It is possible to broadcast the stream to a slot to the server which will rebroadcast up to 5000 listeners, for example with Listen2MyRadio, which requires very low bandwidth for uploading.
Free hosts
Radionomy
- Radionomy allows you to create your Webradio for free, everything is explained on the official site.
- It is completely free for 9 months but you must total a certain number of hours of hearing to hope to keep it.
Listen2MyRadio and Shoutcast
A big advantage is the fact that as you are going to send a single stream to the server, it consumes almost nothing in upload, and it allows to host many more listeners thanks to the Listen2Myradio server and to be able to use the upload again. of the pc which will only be slightly cluttered (1 connection).
However if you reach the maximum upload, for example it happens with dropbox simultaneously when it uploads files to the server, then a bug occurs. You will receive choppy music and this bugged Winamp.
To remedy this, simply configure the maximum upload dropbox or other programs. For example on a 128kbs connection, cap between 90 and 100 this will be enough not to interfere, not hesitate to test, even locally, because it is buggy if it is not respected.
Listen2MyRadio includes:
- Free web host in English
- Personal page & Personal subdomain
- Shoutbox, blog and gallery
- Up to 5000 listeners without loss of quality
- Flash Player & Windows Media Player.
- Funded by advertisements
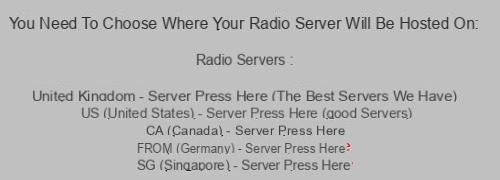
- 3 different server locations & Installation
Open a free account
- Create an account by entering the requested information, you will receive a confirmation e-mail and you must log in to the site.
- Fill in the information relating to your radio, such as: password, description text on the right and left of the page.
- Then you will have to choose one of your servers, take "the best" first
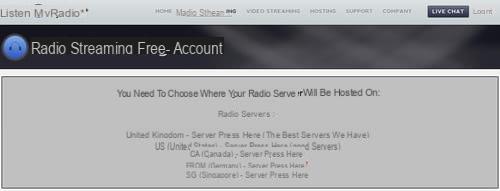
- Once the chosen server you will reach this page:
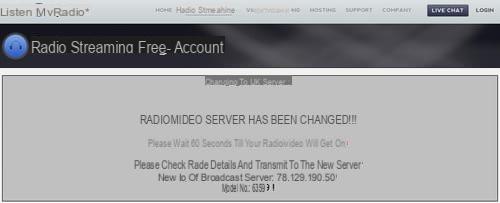
- So you have the ip and port of your radio if you do http: ... and: your port you will access Shoutcast. Otherwise you will have an address like http://maradio.listen2myradio.com
- There you have everything you need to create your Internet radio station.
- Then you go to the management page, check that the status of the stream is activated.
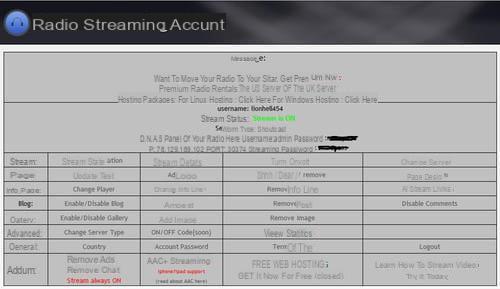
- Download Winamp ..
- Install Winamp, you can uncheck the last options which are false.
- Shoutcast Plugin DSP for Windows 32bits, 64bits, Linux and Mac., At the bottom of the page There is 2.3.5. Notes on the latest update (http://forums.winamp.com/showthread.php?t= 372044% 29
2.3.5 DSP Version.
If you have one of the previous versions update because there are a lot of bug fixes. Especially stable with the last winamp, which is not the case of the 2.3.3.
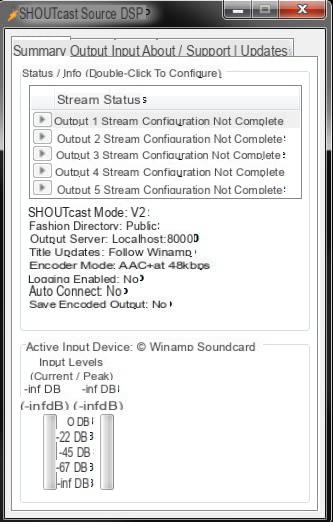
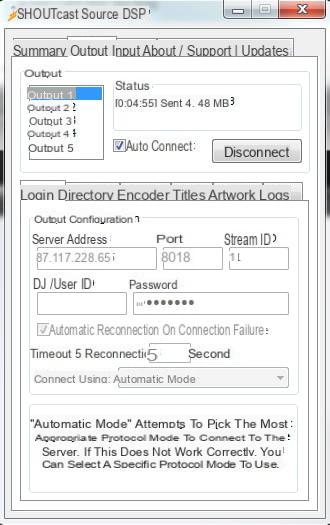
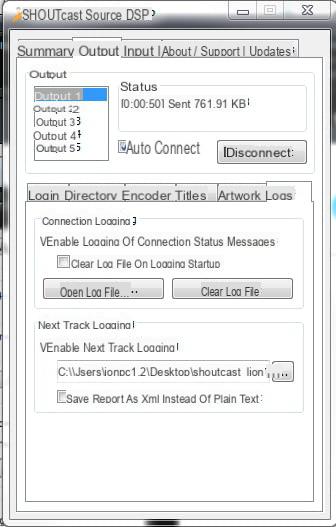
- Enter the IP address and port of the server given to you. Address = IP, Port = Port of the radio. You will also have to enter the password. For the 2.3.4 version we must strangely delete the username in "user ID"if it doesn't work because of an authentication error.
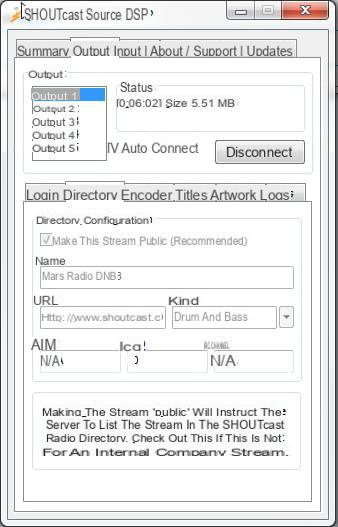
- In "Directory", enter the name of your radio. You can also enter the Gender and enter the url, that is to say the link of the webradio.
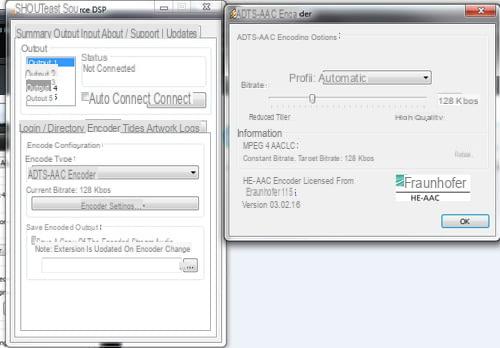
- You can start by calibrating the format MP3 to 128kbps 44 100Khz stereo. Since version 2.3.5 you can use the AAC encoder format.
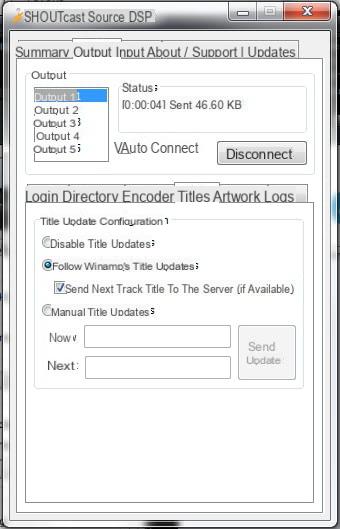
- in "Title" you can deactivate or activate the automatic updating of the titles of the songs / mix. It is also possible to do it manually.
- The "Logs" tab is new and very useful because it allows you to have a Log detailing the connection, you just need to check it, Enable loggin of connection status messages. "Next Track Loggin" allows to obtain a file which will give you the next title.
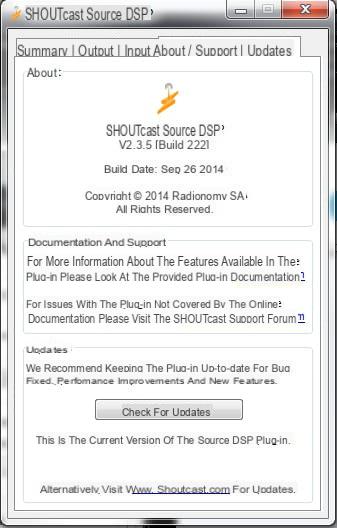
- Since the 2.3.5 version of the DSP plug you can update automatically:
- Just connect and check auto connect, if you have filled in everything correctly, a stream counter should start to run.
- Once the server is started and Winamp started with the DSP configured, you can access the Shoutcast management page with the IP and the port.

- Click on Admin, enter your username and password and you will have access to the WebRadio management page.

Check the status of the service
We will see the main and free options because it is possible to pay to have statistics and other options not required.
Already noticed the connection status here:

Choice of reader
The player choice menu lets you choose which one you want to display on your listen2MyRadio radio page. Attention: Choose it according to your stream format because at the beginning it was ".mp3" but now there is ".aac". If the stream is not supported by the player, you simply won't get any sound. So be careful with the streams that shoutcast encodes in the right format.

After that depends on the format you are going to use:
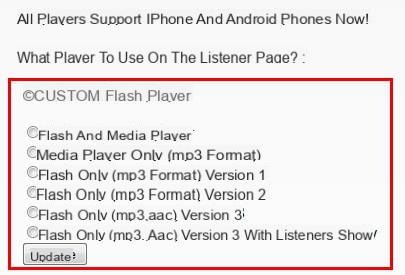
This does not prevent that you also have the possibility of containing yourself by player like windows media player, winamp etc ...
Choice of the Country
Select your country here:
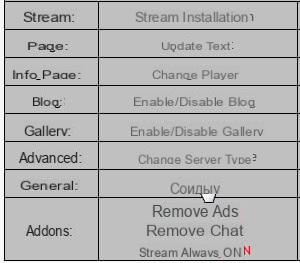
Find out more
"Show detail" allows you to have information like the IP port and the url to listen to.
Change server
"Change server" allows you to change server in the event of a problem:
See all links
This menu will allow you to have all the addresses:

Paying Hosts
Radioking
The RadioKing platform offers you different offers according to your expectations.
Benefit from adapted offers such as:
- Radio server (Shoutcast V2, statistics in AJAX, Management of covers, creation of host accounts).
- Cloud DJ which allows you to manage the broadcasting of your radio directly online.
- Possibility to create a radio site.
- Create your Mobile radio application in a few clicks.
- Video tutorial, How to create a Radio Server with Radio King.
OVH
Copyright
SACEM Webradio associative
More information


