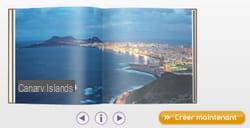
- Prepare your book
- Installation
- Choice of format
- Background
- Layout
- Insert photos
- Correction of photos
- Add a frame
- The text
- Finalize your book
More and more e-merchants offer the creation of personalized photo books. For this production, many sites use the free software Cewe, reference for the layout of a photo book: Carrefour, Fnac, Comboost, Amazon, Book-photo, etc. Learn how to easily configure this software.
Prepare your book
- Choice of photos and organization: prepare your photos, make a selection in advance of your images, their order and group them in the same folder. In this way, the production of your book will be faster.
- Think about the layout: before you start, ask yourself how many photos you want to print, try to tell a story over the pages, in pictures but also with captions.
- Think about the themes: whether it's your vacation photos or a series of portraits, don't get too dispersed. Group your photos by theme, such as places, events or colors for example.
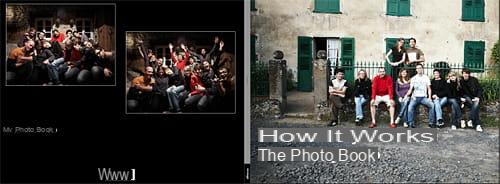
Installation
Associated with each e-merchant, the software can be downloaded from the corresponding sites. So, if you want to order your photo book on the Fnac site for example, you will have to download the software directly from their site.
You can consult the list of partners directly on the publisher's website: livrephoto-cewe.com
Once loaded, launch the installation, then follow the different steps. You can then view the different offers of the merchant, choose one, even if you can change your choice at any time thereafter. Of course, nothing commits you to validate this order, which you will carry out later if you wish.
Choice of format

Depending on your budget, your needs and the quality of your photos, the software offers several formats, from the small A5 book to the very large A3 type.
Likewise, there are multiple cover choices (rigid, flexible, canvas, etc.) as is the quality of the paper (mat, gloss, satin, etc.).
If you change your mind after your first selection, a box at the bottom left allows you to quickly choose another format, the number of pages, the type of paper: the price is also displayed with each modification so as not to feel trap.
Background
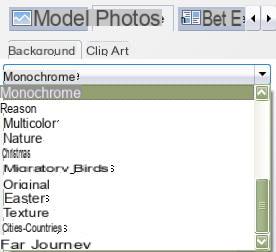
Cewe offers a large number of themed backgrounds, depending on the colors and textures you select.
In the "Model> Background" tab, choose your theme, your color, then your texture. If you prefer a more sober background, go for the Monochrome theme, then click on the desired color.
These modifications must be repeated for each double page.
The Clipart tab corresponds to small patterns, designs that you can add to your pages. Just choose your theme and then drag the logo onto your pages.
Layout
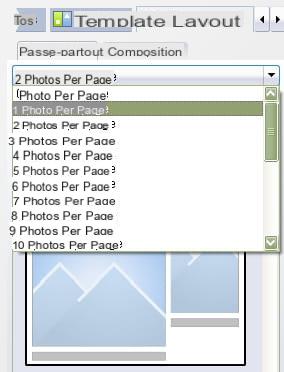
The Layout tab gives you access to the configuration of your pages, the layout of the various photos and captions:
- The number of photos per page: 1, 2 ... 10 photos per page. To choose according to your budget and your desires.
- Pre-compositions: depending on the number of photos you have chosen, the software offers ready-made compositions, such as side-by-side photos, one above the other or overlapping, as well as possible inserts for writing text.
- Adjust: these compositions serve as models, they are however fully modular. Size of images, text inset, their place on the page, etc. If your image is not large enough and you zoom it in, the software displays an exclamation mark to alert you.

- Full page: to turn your photo into a background image, right-click on the snapshot you just dragged onto your insert> Other photo settings> select photo as background (left, right, or both).
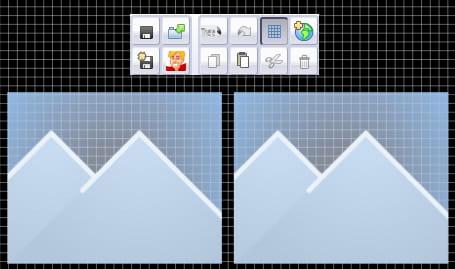
- A grid: if you want to move and place each image with precision, the software can display a grid which will serve as a guide grid. This will not be seen in the draw.
Insert photos
 Your photo folder is ready, your images sorted, the layout configured. All you have to do is insert each image in the desired location.
At the bottom of your page, you can see the selected double page spread.
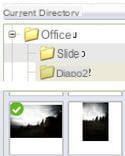
On the left, in the Photos tab, go to the folder where your images are placed. Then drag each image into the box that interests you.
Correction of photos
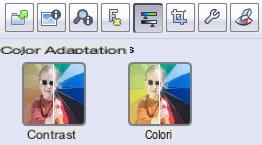
Once your image is in place, Cewe has a small tool for correcting your photos. To access it, double click on your image. A new window opens and allows you to retouch your photo: cropping, straightening, red eyes, colors, brightness, contrast, etc. The processing is light but sufficient to simply enhance your images.
Add a frame
Beyond the boilerplate type frames available in the Layout tab, you can add a color frame of whatever thickness you like. To do this, click on the small logo at the top right with the framed image: you can then configure the thickness of the frame, the color, a shadow of the frame as well as the application on a photo, those of the double page or all the photos in your book. 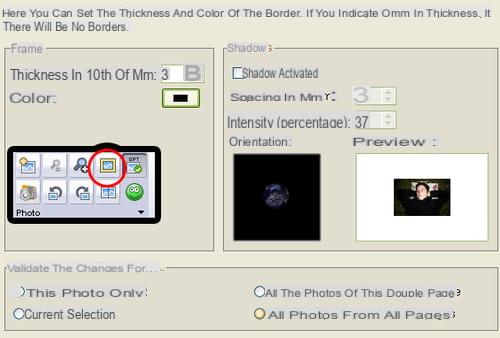
The text
 In addition to the text insert present on the template you have chosen, the insertion of a new frame is possible with the "Text +" tool. The logo is present in the part dedicated to the selection of the text style, size, etc. The new insert that appears is also flexible: size, positioning.
Finalize your book
Once your book is finished and verified, you can save your work to your hard drive. Then click on the floppy disk logo at the top of the program.
As the software is dedicated to the merchant partner, you can directly place the order whenever you want.


