
Summary
- > What is an Apple account?
- > How to create an Apple account?
- > Security of your Apple account
- > How to access your Apple account?
- > How to modify your Apple account?
- > How to reset an Apple account?
- > How do I delete my account?
Who says Apple product, says Apple account. Even if you are not technically obliged to have one, without it you will not be able to access the brand's multiple services: iCloud, Find My iPhone, iTunes, Apple Music...
To create your Apple account, you will only need a username and password. Your name will be followed by iCloud.com or mac.com.
1. What is an Apple account?
If we had to define the Apple account in one word, it would be: passport. A passport giving you access to all Apple products and services and which is obtained by simply creating an identifier, the Apple ID.
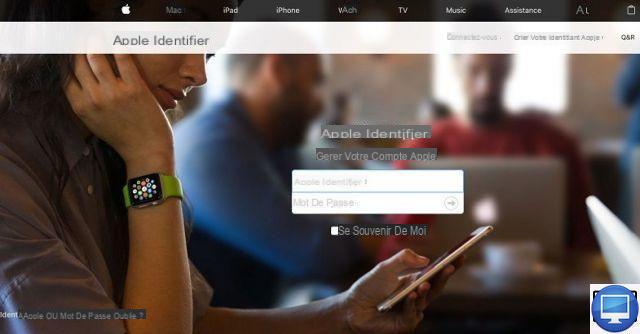
You'll need this account for everything from booking an appointment with Apple Support, buying music or new apps, to a simple FaceTime call.
Beyond that, this identification makes it possible to make the link between you and your Apple devices. Thanks to this identifier, Apple will associate you with the various Apple products that you own.
Note that it is entirely possible to use a Mac or other iOS device without an Apple ID, but you will not be able to benefit from the brand's services.
2.How to create an Apple account?
Go to the Apple site, to the identification page. Then click Create your Apple account.
Apple is open to all profiles. If you are a Windows, Linux or just curious user, you can still create an Apple account.
This account is free and automatically gives you access to iCloud with 1 GB storage and access to applications: Pages, Numbers and Keynote.
To take advantage of more services, it will in some cases be necessary to download or purchase applications.
When creating your Apple account, you will be asked for an email address to be associated with your username.
A second email address will be required to recreate your password, if you have forgotten it for example.
Don't be tempted to enter a fake email address as a confirmation email will be sent to that address. Then you must enter the code (valid for 3 hours) contained in the email to activate your Apple account.
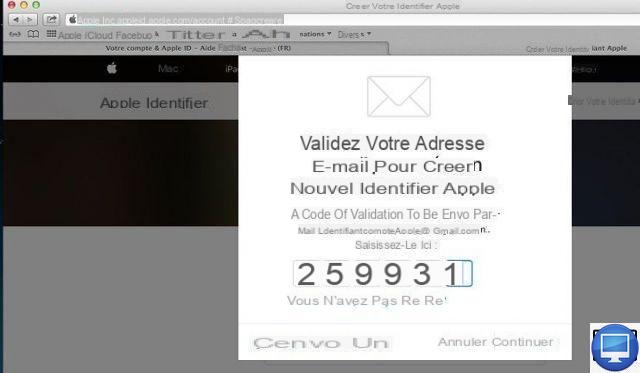
The information you enter must also be authentic because it will be used by Apple to secure your account.
Regarding your country of residence, entering false details could prevent you from having access to certain offers. Indeed, applications like Music, Movies have different offers depending on the country; the same goes for in-app purchases.
So if you live in Bordeaux and enter Quebec City then you will not be able to make purchases unless you have a Canadian bank card. In addition, you will also be limited to products sold in Canadian territory.
3. Security of your Apple account
After creating, comes securing! The latter goes through a 2-step verification system.
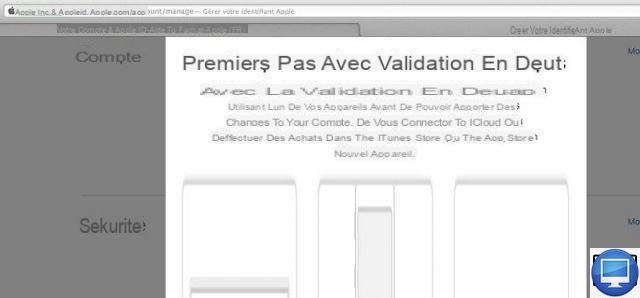
It helps protect your account from hacking, so we recommend that you do it.
Here's how to set up your verification code:
- Go to the Apple ID page.
- In the section Manage your Apple ID, fill in the fields: Apple ID et Password.
- Then log in.
- Go to the section Security → Two-step validation, then click Start.
- In the window that opens, click Continue, then a phone number is asked of you.
From there, you are asked to register a trusted device like your iPhone or Mac. This device is said to be trusted because you have already used it to log in to your account.
As soon as your device is entered, a 4-digit verification code is sent to you. Enter this code to confirm it. At the "verify trusted devices" window, click Continue. A emergency key (a mixture of numbers and letters) is automatically assigned to you.
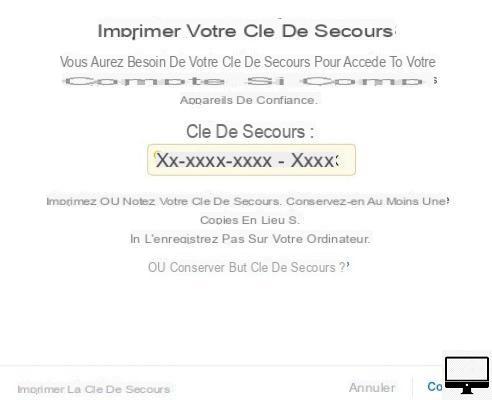
Then you will have to re-enter it to confirm it.
It is very important to keep it in a safe place, because if you forget your password, for example, then you will need your recovery key.
We recommend that you provide at least one telephone number in order to be able to receive this code by SMS.
For example, if you connect to iCloud from a Mac that you have not yet associated with your account, then you will receive your verification code on your smartphone, which is linked to your account. So for access to iCloud from the Mac: enter your password and the verification code received.
To summarize, each time you log in to your Apple account, you must enter your password, then your verification code. So always have your phone next to you.
Use a password specific to non-Apple products
When you want to use a third-party app (not developed by Apple), but which accepts sending and receiving iCloud emails, then you must create a password specific to this app.
This code prevents third-party apps from accessing your Apple account.
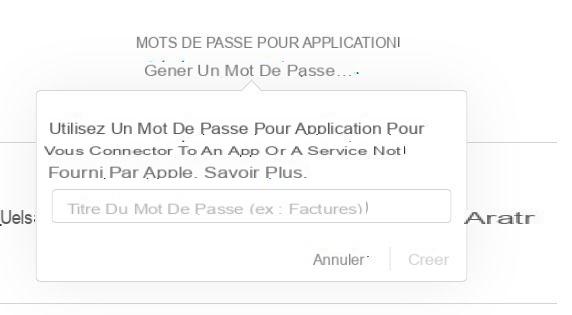
To do this :
- Meet the page My Apple ID.
- Sous Safety → Application Passwords, click on Generate a password.
- Enter a title to the app as requested, then click Create.
- Then a password, consisting of 16 letters, is generated automatically. It is this password that must be entered for the desired application.
We advise you to copy it somewhere.
The password(s) for these applications can be deactivated at any time, however, once they have been deactivated you must "recreate" a password.
To cancel your password, follow these steps:
- In the section Safety always click on Edit in blue
- Go down to Application Passwords, click on View history.
- Click on Revoke all and Completed.
4. How to access your Apple account?
Now that your account is protected, it's time to log in. As we have seen, an Apple ID leads to the creation of an iCloud account.
However, Apple allows you to have two different identifiers, one to access iCloud, the other, for example, dedicated to the purchase of films, music or Apple Books (formerly iBooks).
Which is very practical in the case of a hack or when you don't want to link your credit card to your iCloud.
Via a Mac:
iTunes: Click [name], then click the Connect option in the drop-down menu, at the top right of the window.
App Store: Click on the logo at the top right, in the shape of a bag, enter your username and mot de passe and Log in.
iCloud: Open System Preferences ..., click on the icon iCloud, then sign in.
Apple Books: To be able to buy, sign up and open Apple Books. Then click Sign In under the Quick Links list on the right side of the window.
To read your purchased Apple Books, click the menu Store, And then Authorize this computer.
Via an iOS:
iTunes Store and App Store: select their corresponding icon, scroll down the page and click the button Log in.
Apple Books (iBooks): As soon as you launch the application, the login window appears. You don't have to log in unless you're making a purchase or want to see your purchase history.
iCloud: When you set up your iOS device, you are immediately prompted to sign in to iCloud. If you want to do it later, open Settings → [name] and select iCloud.
When setting up your iOS, you will have the choice to enter two Apple IDs, one for iCloud and one for iTunes. And, on a Mac, you can enter an identifier for iTunes or Apple Books and one for iCloud (via System Preferences…), for example.
Note that Apple does not allow the combination of two or more accounts, or even the transfer of Apple purchases or data from one account to another. For example, if you have an account dedicated to iCloud and another dedicated to iTunes, no association of the two will be possible.
Also, when you log in to iTunes via a Mac for example and entered a different ID, you will be denied access for 90 days.
Simply put, Apple makes your life easier if you only have one ID.
Family sharing
As the name suggests, Family Sharing is a joint account dedicated to the family, up to six members.
This account allows the creation and sharing of a calendar, a family diary or a gallery of holiday photos...
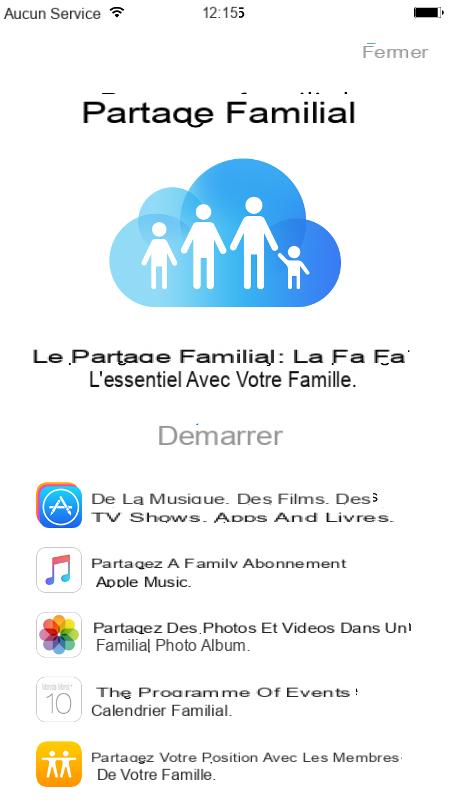
This account has 2 other important functions:
- Management of the family budget via a common credit card for family members. Everyone can use it to make purchases.
- Apple will ask you to link only one credit card to this family account. You will need to enter the verification number of this credit card (CVV, the 3-digit code on the back). Small clarification: no other type of credit card is accepted.
- Locate family members via apps Find My Friends et Messages. Make sure this feature is enabled for each of you.
Set up Family Sharing:
On iPad/iPhone/iPod Touch: Open Settings, select your [name], then the option Set up Family Sharing, then follow the steps explained on this Apple page.
On Macs: Open System Preferences ..., click on iCloud, And then Set up a family. Follow the instructions.
Note that a child under the age of 13 can have their Apple account but only within the framework of Family Sharing. This measure is required to comply with the law relating to the protection of minors on the Internet.
Family Sharing for minors under 13:
From your iPhone/iPad or iPod Touch: Follow the path: Settings → iCloud → Family → Add member. Then click on the link Create an Apple ID for a Child.
From your Mac:
- Open System Preferences.
- Click on the icon iCloud.
- Finally, click on: Manage family.
- Click on the button (+), at the bottom left.
- Select: Create an Apple ID for a Child who doesn't have an account.
5. How to change your Apple account?
In this part, we show you how to change the information entered when creating your account.
Modify your personal information:
On Mac: Go to System Preferences…→ iCloud → Account details.
On an iOS device: Go to General → Settings → iCloud, then select your name. Any modification is then done by selecting Modify, at the top right.
Change the email address associated with your Apple ID?
To change it, go to the Apple ID page, click Manage your Apple ID and log in.
Select Name, Username, Email address, click on Edit.
Then enter a new email address, make sure it hasn't been used for another Apple account.
Please note that Apple IDs using email addresses ending in: @icloud.com, @me.com, or @mac.com cannot be changed.
If this is your case, enter your new email address as an additional address and not the main one.
Apple will send you a notification following your change.
Why should you link your primary email address to your Apple account?
Each time you purchase content from iTunes or another app, you'll receive confirmation emails. Yes Localiser mon iPhone is used or if your ID is added to another device, it will be the same as when you change your password.
For every major transaction made on your account, it will be like this.
Linking your main email address to your account mainly helps to identify attempts or fraud on your account.
When should you change the email address associated with your username?
If you no longer use your email address or it has been hacked, you are strongly advised to change it.
To do this: go to the Apple ID page, select Manage your Apple ID, and log in.
You can also add an email address as before. Click on Add, sous Contact, enter one. Click on Save changes. A verification email will be sent to this account to confirm the given email address.
Add a payment method
To add a payment method: Go to the section Payment and Shipping → Add a payment method, then complete the form.
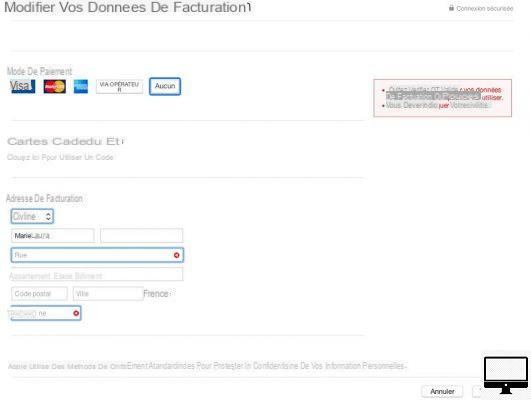
If you don't want to add credit cards, select No.
For almost all other day-to-day transactions, you don't need to link a payment card to your Apple account.
iPhone/iPad/iPod Touch: Open iTunes Store, scroll down and select your login. Select Payment method.
Finally, enter your information.
Mac: Open iTunes, click on the icon Music top left, then Account. Click on Edit, next to Payment method.
Finally, enter your information.
Change your password
If you forget your password: go to the page iForgot, then enter your username.
If you had protected your account with two-step verification:
- Enter your recovery code.
- As soon as it is validated, a verification code will be sent to one of your devices linked to your account.
Without these two codes, you cannot access your Apple account.
Very important note: if you have forgotten your password ET your recovery code, you will have to create a new Apple account, because even Apple's Help service will not be able to verify your identity.
If you didn't use two-step verification:
- Click on the email sent to your inbox; it will be active for 3 hours, after which your request will be cancelled.
- Then, answer the three security questions and give your date of birth.
Can't remember your username?
No way to remember your username? Don't worry, it's still possible to find it.
iPhone/iPad: If when you buy apps or music you use your ID, go to Settings → iTunes and App Store ou Settings → iCloud → Account.
If you still can't find it, the iForgot page is there.
Click on Forgot username or password. You will be asked to enter your first and last name and the email address linked to your account. A password reset email will be sent to the address entered.
Again, if you had opted for two-step verification, you will have to enter the recovery code. The procedure is the same as for a forgotten password.
What to do if your account is blocked?
If you notice that your account is deactivated or blocked for security reasons, or if you have entered the wrong password several times, then also visit iForgot.
And follow the same method as in case of forgetting.
In this case, Apple may unblock your account after 24 hours.
Two-step verification follows the same process as for forgetting.
What to do if you think you've been hacked?
Answer: You need to change your password.
It's very simple to do: enter the email address associated with your Apple ID. Then, Apple sends you an email allowing you to change your password.
Remember, each password is associated with an email address. So, if you have associated it with several email addresses, then you will have to change this password for each of them.
6. How do I reset an Apple account?
For security reasons, many users think of having only one account.
Apple wants to be very vigilant in terms of securing the accounts of its users, by scrupulously controlling their identity, access and the sharing of their information.
To protect your personal information, you can edit it and make it less personal.
Once these changes have been made, remember that you will no longer be able to access, use or purchase applications linked to your old account.
Here's how to reset your data and keep control of your account:
- Go to the Apple ID page.
- Enter your username and password.
- Select Manage.
- Select Edit, in front of account
- Change your Name then select Completed.
- Select Edit, in the Payment and delivery section.
- Remove your Address and your bank details, then select Completed.
- Select your Phone number, enter a new area code and make sure the number format matches the country. Then select Save.
- Select Log out, top right.
7.How to delete my account?
Is it possible to delete your Apple account?
You cannot delete your Apple account, but you can delete your personal information entered.
On Mac:
- Open iTunes on Mac.
- Select iTunes Store (right), then Sign in.
- Log in.
- Click on Manage devices under iTunes.
- Click on Remove next to each device associated with your account.
- Select Store and Deauthorize this computer.
On your iOS devices, here an iPhone:
- Go to Settings.
- Select your account.
- Open iCloud.
- Enter your password.
- Select Appareils.
- Select each device, then Delete your account.
- If you had set up Family Sharing, select Family and Remove for each member of the family.
- Select Log out and Delete from my iPhone.
- Select Settings and iTunes and App Store.
- Enter your login and select Delete account.
- Select Settings and Music.
- Sous Home, select Apple ID and Delete account.
- Select Settings and Mail, Contacts, Calendar.
- Sous Accounts, select your iCloud account, then Delete account.
- Select Settings → Messages → Sending and receiving. Select Apple ID and Delete account.
- Go back to Settings and select Game Center. Select Apple ID and Delete account.
- Select Settings → Facetime. Select Apple ID et Delete account.


