Like its peers Skype or Google Meet, the Zoom video conferencing application can be subject to a number of technical hazards. Sometimes the webcam does not appear in the settings or is selected but does not display video.
In these cases, do not panic: it is quite possible to test your camera (s) and adjust your configuration before a meeting on Zoom. Changing these preferences may not have the effect of 4K video on an OLED display, but it should still boost the quality of your video conferences. Let's see how to properly set up Zoom so that everything works smoothly during your video calls, on Windows, Ubuntu and macOS.
Configure your camera on Zoom
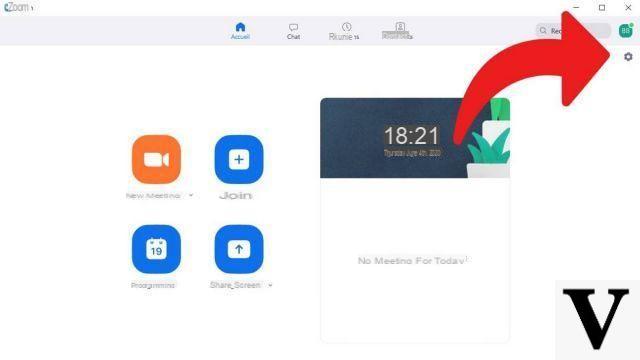
- Open your Zoom desktop application and connect to the service, then click on the " Parameters »At the top right of the window. Activate the camera on your machine.

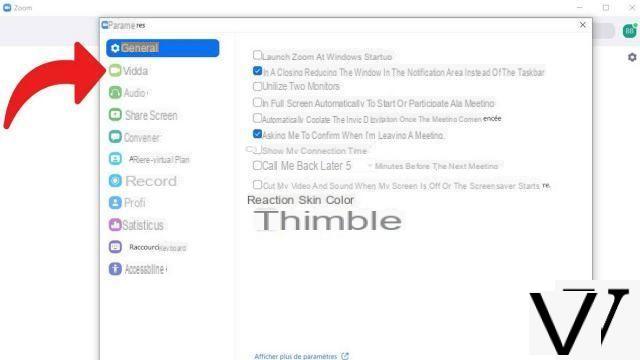
- The settings panel opens. Click on the " Video ».

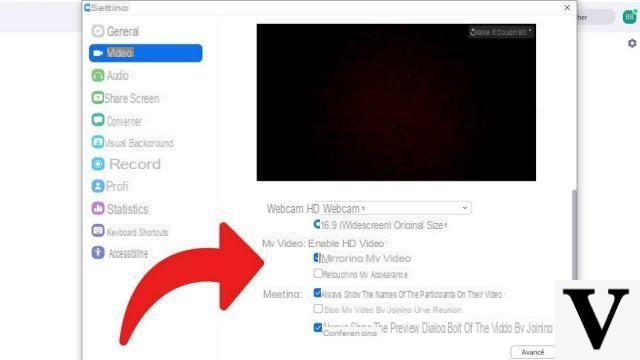
- You then have a video preview of the rendering of your default camera. Below, a configuration panel allows you to modify certain parameters: choice of the camera used, high definition video, mirror mode, etc. Select the settings according to your taste.

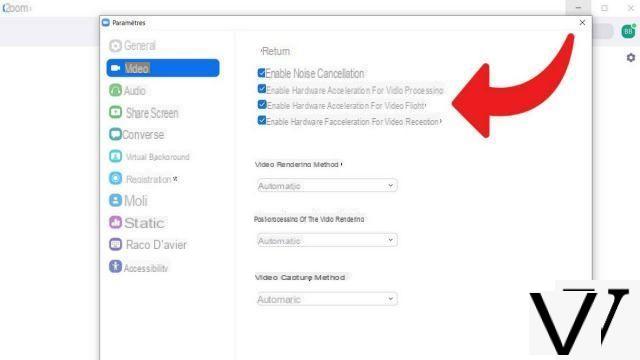
- The button " Advanced ”, Located at the bottom right of the same page, allows you to access more complex options for your webcam (s), such as the video rendering method or noise cancellation.

Let's go into a little more detail on the possibilities offered concerning the webcam, video recordings and the use of peripherals on Zoom. Zoom's interface on mobile and desktop applications is easy to learn, but less so on web browsers. Let's take advantage of it.
The quality of your video connection on desktop will obviously depend on the bandwidth of your Wi-Fi network. This may vary during a meeting, this is normal. But if it is too bad, do not hesitate to connect by Ethernet cable, compatible on most computers. To obtain HD video and HD audio on Zoom, it is a priori not necessary to have a terminal with great power or a state-of-the-art processor. On the other hand, it is better to avoid the use of an HDMI cable, in particular to use the audio, the video or the speakers of its television, because this can drop the quality from 1080p to 240p as if by magic. Do not hesitate to restart a videoconference if the quality of the video stream is too bad.
Remember, as we wrote in a previous tutorial, that it is possible to modify your audio settings on Zoom in a similar way. The audio and video settings work the same and the sensitivity of the microphone or speaker can be changed to your preference in a similar way.
If your devices aren't working on Zoom, it's probably coming from your machine. Go to Device Manager and make sure that the latest version of the drivers is in place and that the updates are present on your hard drive.
It is also possible to activate beauty filters or to put “backgrounds” on your video for more fun, as we will see in a future tutorial.
Find other tutorials to help you set up Zoom properly:
- How to download and install Zoom?
- How do I activate a ringtone when someone joins a meeting on Zoom?
- How to change the sensitivity of its microphone on Zoom?
- How do I change the font size on Zoom?
- How to create a channel on Zoom?


