Connect the WiFi printer to the PC using the setup wizard
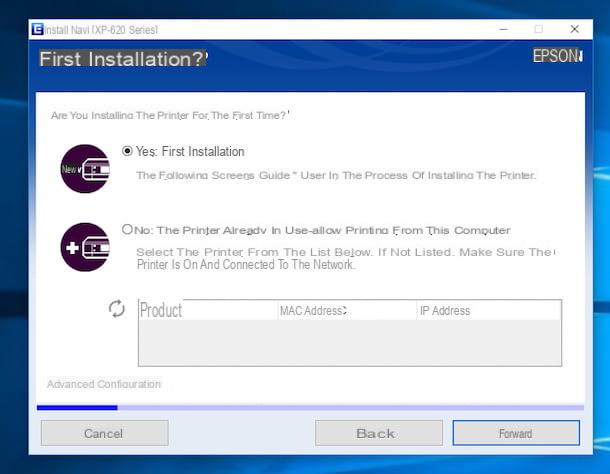
Usually WiFi printers are marketed with an installation disc which is inside the sales package. The disk contains the drivers to install the printer on the PC, the software associated with the device and the wizard to connect the printer wirelessly. If after carrying out this procedure for the first time you have not been able to connect your wireless printer to your computer, try to do everything from scratch by inserting the printer disk into the CD / DVD drive of your computer and waiting for the device setup to run. start automatically.
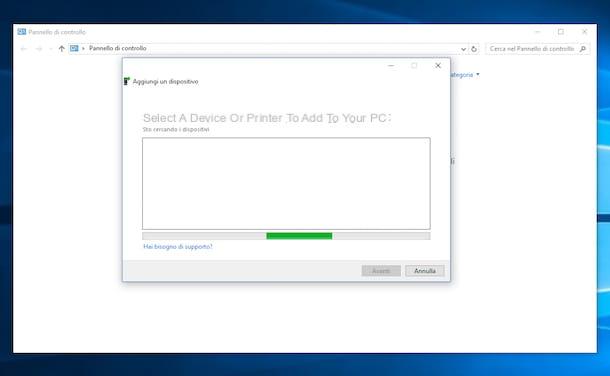
If the setup does not start automatically, press the button Home, click Control Panel, locate the section Hardware and sound (if you can't see it, make sure that in the menu located in the upper right part of the window displayed is selected the item Category), click Add a device and wait for the computer to detect the printer.

If you do not have the printer installation disk at your disposal, you can add the device drivers to your computer by downloading them from the Internet. To do this, just open your favorite Web browser, connect to the website of the manufacturer of your printer, type in the search field usually present at the top the model name of your printer (for example Epson XP-620), locate and / or click on the section driver of the displayed web page and download it to your computer. If you have any difficulties you can try to take a look at my tutorials dedicated to HP drivers, Epson drivers and Canon drivers.
Once you have finished downloading the drivers from the Internet, open their installation package (eg. [printernamewifi] .exe) simple by double clicking on the executable file you just got.
At this point, regardless of whether you are using the disk attached to the printer sales package or whether you have found the necessary drivers to be able to use the device from the Internet, the wizard should start to connect the WiFi printer to the printer. PC. The wizard is different for each printer but roughly involves these steps: at the beginning you have to select the type of connection to use for the printer (Ethernet or WiFi), then you have to temporarily connect the device to the computer via USB cable, set the automatic transfer of the wireless connection data to the printer and wait for the procedure to finish. If this method fails, try using manual setup and manually entering the WiFi connection name and password during the procedure.

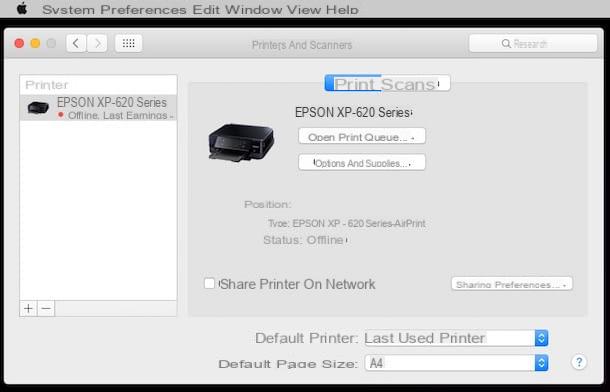
In the case of Macs, this is good to keep in mind, it is very unlikely that you will need to manually download the drivers from the Internet in order to connect WiFi printer to your PC. In fact, in most cases as soon as a printer is connected to the Mac via a USB cable, it is recognized automatically. OS X itself will then download the drivers necessary to connect the WiFi printer to the PC and use it correctly from the Internet.

Connect the WiFi printer to the PC via the internal panel
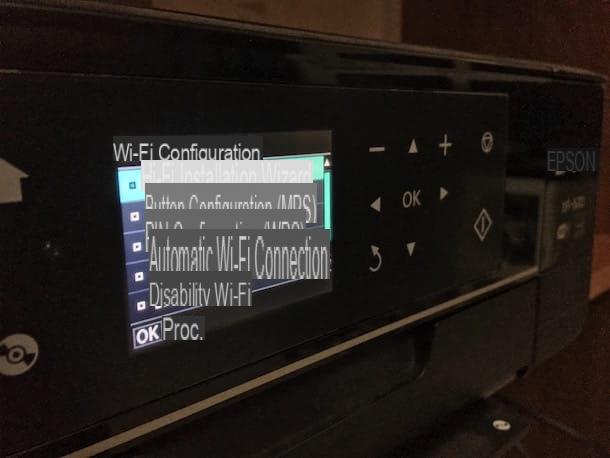
When the configuration via computer fails to be successful, the only thing to do to remedy is to try to connect the WiFi printer to the PC by acting directly on the internal panel of the device. To do this, just use the buttons on the front panel of the printer, usually next to the display. Specifically, you need to find the voice Wi-Fi or wireless in the device menu, select it and then start scanning for networks using the menu Settings.

Then, type or select the name of your wireless network and enter the password needed to log in (if you don't know this information, take a look at my guide on how to find the Wi-Fi password to find out how to get it) then you will be notified on the printer display that the connection has been successfully established.
Alternatively, keep in mind that many WiFi printers also support configuration via WPS. If you've never heard of it, know that WPS, acronym for Wi-Fi Protected Setup, is a technology that allows routers and wireless devices that support them to communicate by simply pressing a button or by entering an 8-digit PIN.
If the WPS technology is supported, to connect a WiFi printer via WPS you just need to press the button that says WPS present on your router and, after a few moments, press the same button on your printer.
At the end of the procedure, wait a few seconds and you should see the Wi-Fi light on the printer fix or a message on the display indicating that the procedure was successful. This means that the printer has successfully connected to the wireless network and, consequently, should work normally by sending print commands from the PC without further action.
How to connect WiFi printer to PC


