How to connect Android phone to PC without cable
In this chapter of the guide I'll show you how to connect an android phone to computer without using any cables. The only requirement for the correct execution of the procedure is that both devices are connected to the same Wi-Fi network, so as to be able to transfer data quickly and easily.
AirDroid
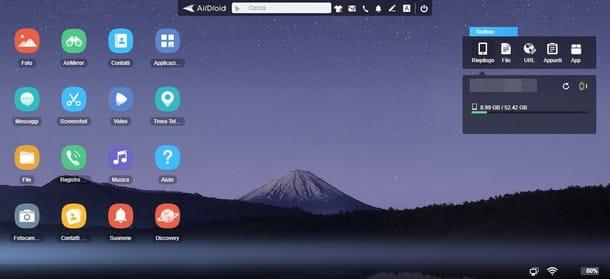
The first service I can recommend for this purpose is AirDroid, a management platform dedicated to smartphones and tablets, available in the form of an app for smartphones and tablets, a computer program and, above all, a Web application (therefore usable via the browser), ideal for use on shared computers , or for which you do not have administrative permissions. AirDroid's free subscription plan allows you to manage single device at a time, of transfer from phone to PC maximum file size equal to 30 MB and to move a maximum of 200 MB of data.
To use AirDroid, it is advisable (but not necessary) to register for a free account: in this way, it is possible to establish an encrypted communication between devices and view notifications in real time, as well as avoiding having to repeat the procedure every time. pairing. To register for the service, simply visit this Web page, click on the item Subscribe and fill in the next form with the requested information: an address e-mail valid, a Password it's a nickname, and then finalize everything by pressing the button Following; alternatively, you can "speed up" the procedure by logging in via Facebook, Google o Twitter, using the appropriate buttons located at the bottom.
For your information, you should also know that AirDroid provides the possibility of subscribing to a monthly subscription plan (1,99 € / month) or yearly (19,99 € / year) which removes the advertising and restrictions imposed by the "free" plan: unlimited transfer quota, ability to manage up to 4 devices at the same time, ability to transfer folders from PC to smartphone, 1 GB limit for the transfer of a single file , the ability to selectively disable notifications and the ability to turn on the phone's microphone and cameras from your computer. In addition, AirDroid Premium includes in the subscription a system to find the device in case of loss or theft. If you are interested in the benefits of the Premium version, you can sign up for a subscription here.
In any case, using AirDroid is really simple: to begin with, install the app on your device by downloading it directly from the Play Store, start it and log in to the service using the credentials created during registration. At this point, connected to the Internet page of AirDroid Web, log in using the same credentials seen above and you're done: if everything went right, you should view the device management console on your computer.
If, on the other hand, you have decided to take advantage of AirDroid without registering for the service, after connecting to the Internet page of the same, start the app on the Android device, tap on the barcode located at the top right and, after authorizing the app to use the camera, frame the QR code that appears on the page displayed on the computer to establish the connection, taking care to remove the check mark from the box Connect via HTTPS.
Now you can take action. The AirDroid Web desktop is very easy to use: just double-click on the available icons (photos, contacts, applications, screenshots and so on) to access the smartphone features of the same name, such as viewing photos and contacts, list of installed apps, making screenshots and so on. When you're done, you can disconnect by simply closing the browser window.
Note: if you prefer to use AirDroid via an independent program, you can install the software dedicated to Windows and macOS, available on the official website. After completing the installation, start the program and enter the login credentials of the AirDroid account created previously: the interface and the functions of the program are very similar to what was seen in the Web version, with the additional possibility of viewing smartphone notifications directly on the PC.
Pushbullet
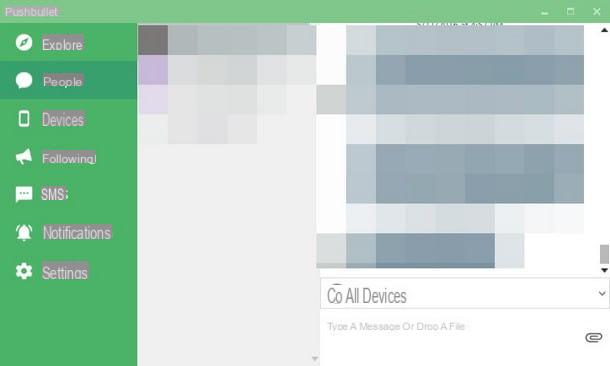
If AirDroid failed to meet your expectations, you can give a chance to Pushbullet: this service, in particular, allows you to view Android notifications directly on your computer, to reply to messages received on your smartphone and, among other things, to exchange files between associated devices. Pushbullet is available as a web service, a Windows program, and an extension for Chrome, Firefox and Safari browsers.
Pushbullet has two usage plans, both with mandatory registration via Google o Facebook: the first free plan has some limitations on transfers (a single file can be as large as 25 MB), offers 2 GB of dedicated cloud space and allows you to respond to a maximum of 100 SMS or chat per month; the Pro plan, which costs $ 3,33 / month (o $ 59,88 / year), imposes much more flexible limits: the maximum size of a file to be transferred can reach 1 GB, the cloud space included in the price is equal to 100 GB and you can reply to chats and messages from your computer without any limits. is Pushbullet. As for AirDroid, it also offers an app, a website and a program to be installed on your computer in order to properly manage the service. Furthermore, by subscribing to a Pro plan, you can activate the Universal Copy & Paste, which allows the sharing of links and notes between devices in a completely automatic way.
In any case, the first thing to do is install the app on the Android smartphone to be connected to the computer, downloading it for free from the Play Store; after that, start the application, tap the button Log in with Google o Accedi con Facebook, depending on your preference, and follow the instructions displayed on the screen to log into the social network of your choice and authorize Pushbullet to use the data. Once this operation is complete, repeatedly press the button Allow to grant Pushbullet the necessary permissions for device management (in particular, those relating to reading notifications, accessing the address book, calls and memory).
When you are done, go to your computer and download the extension that best suits your browser (Chrome, Firefox o Opera) directly from the official website of the service, click on the buttons Add / Add extension or Ottieni / Installa (depending on the browser you are using) and, if necessary, restart the program. At this point, call Pushbullet by clicking on its icon (a P green) located near the browser address bar, click on the button Log in and, using the appropriate buttons, connected to the service using the same social network previously specified on the smartphone: starting from this moment, the notifications received on the phone will be immediately "reflected" in the extension and can be viewed by clicking on the icon attached to the browser.
To transfer a file from computer to phone, click on the extension icon, move to the tab devices, presses the name of your smartphone and "drag" the files into the chat window that opens; once the transfer is complete, you can download the file by starting the Pushbullet app on your smartphone, tapping the section Io and then the icon in the shape of freccia rivolta verse il basso corresponding to the name of the file sent.
To move files from your smartphone to your computer, start the Pushbullet app, repeat the steps above and press the icon in the shape of clip to attach a file, which you can conveniently download to your computer by calling up the extension added to the browser. Likewise, you can also share text, links, and more between multiple devices.
Other cloud services
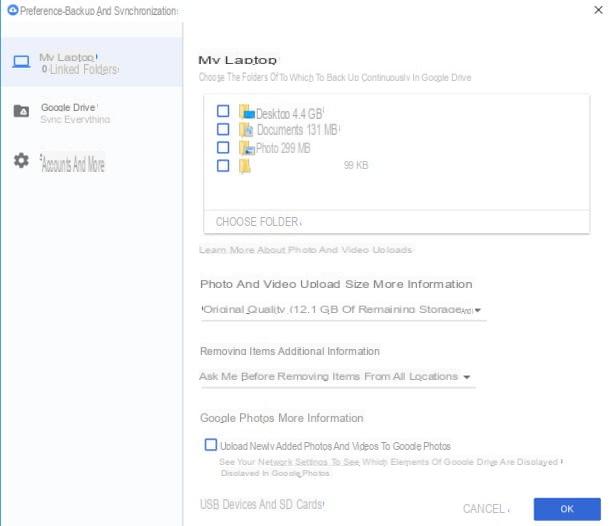
How do you say? You need to connect the phone to the PC without cable only for file swapping? If so, you can rely on one of the many cloud storage services available on the computing scene. As for Android, I would like to advise you right away Google Drive, perfectly integrated into the Google operating system and available for practically all the major desktop platforms (Windows and macOS), as well as in the form of a Web application: I have explained to you in detail how this cloud service works in my guide on how Google Drive works .
This, however, is not the only solution available: there are so many cloud services that exist today, each with different characteristics and peculiarities. If you want a complete overview of what I believe to be the best, I urge you to carefully read my thematic in-depth study dedicated to the best cloud.
How to connect iPhone to PC without cable
Possiedi a iPhone? No problem: there are numerous ways to connect your Apple smartphone to your PC or Mac without cables. It is only up to you to choose the one that best suits your purposes. As with Android smartphones, the only prerequisite is that both devices used are connected to the same Wi-Fi network.
iTunes
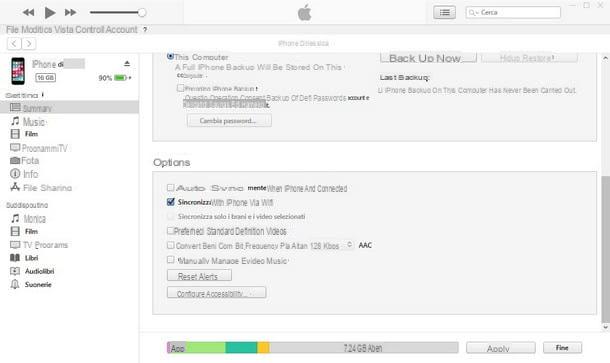
iTunes, the management software dedicated to Apple devices, allows you to connect the iPhone to the computer in wireless, so you can transfer data and create new backups, without necessarily having to rely on the cable every time. However, it is essential that the iPhone is connected at least once to the computer via cable, to enable synchronization via Wi-Fi.
If you don't already have it, you can install iTunes for Windows in the following way: go to the site Internet of the program, click on the button Get it from Microsoft if you have Windows 10, or on the link Windows, available just below, if you intend to use the "classic" installation procedure. In the first case, you can complete the installation by clicking on the button Get and following the procedure suggested by Microsoft Store; in the second case, wait for the download of the setup file (eg. iTunes6464setup.exe) is completed, start it and click on the buttons Yes, NEXT, Install, Yes twice in a row and then on end.
On Mac it is not necessary to proceed with the installation of the program, since it is included “as standard” in the operating system. In any case, if you need help, you can consult my guide on how to download iTunes, which I have prepared especially for you.
At this point, start iTunes and, if you have not already done so, carry out the initial configuration indicating whether or not to use it as the system default player; after that, connect the iPhone to the computer via cable Lightning, tap on the button Allow that appears on the screen of the "iPhone by", type the unlock code of the device and confirm on the computer to authorize the PC and, from the iTunes window open on the latter, click on the icon iPhone located at the top left.
At this point, press on the voice Riepilogo located in the left sidebar, slightly scroll down the window, put the check mark next to the item Sync with iPhone via Wi-Fi and confirm the change by pressing the button Apply: From now on, you can copy files to and from your phone, organize apps and use all the features of iTunes by simply opening the program and connecting your iPhone to the same network as your computer.
If you need additional information on using iTunes to copy files to iPhone, I urge you to consult my specific study on the subject.
AirDrop
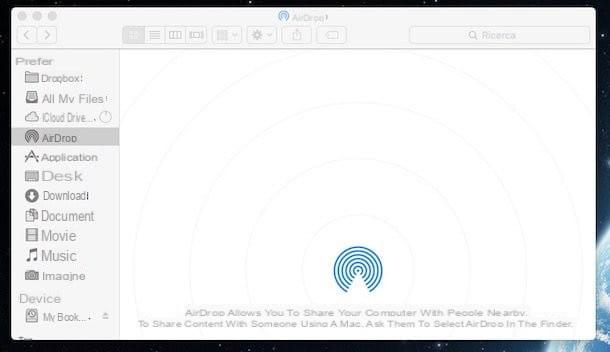
If you want to connect your iPhone to a Mac, you can also use proprietary technology AirDrop, which allows you to connect virtually all Apple-branded devices (Mac, iPhone, iPad, Apple TV, and so on) and to exchange files and information wirelessly, as long as these are connected to the same Wi-Fi network, have Bluetooth connectivity active and are paired with the same Apple ID.
So, first you need to activate AirDrop on the Mac: to do this, click on the menu vai attached to the top panel of the Finder and select the item AirDrop from the menu that appears. If everything went well, a Finder window should open, ready for communication with the iPhone; if necessary, press the appropriate button displayed on the screen to activate the Bluetooth and / or the Wi-Fi.
Once the Mac is set up, grab the iPhone and call up the Control Center by swiping from bottom to top (on iPhone 8 Plus and earlier) or from the top right corner to bottom (on iPhone X and later), turn on Wi-Fi, if necessary, and then press on icon of AirDrop (the one in the shape of concentric circles "interrupted" by an empty triangle). Once this is done, select the item Contacts only from the menu that appears (in this way, you can receive files from yourself and your contacts) and that's it: starting from this moment, you can use wireless sharing via AirDrop to and from your computer, in the ways that I illustrate you below.
- From Mac to iPhone - right click on the file you want to move to the iPhone, select the item Share from the menu that appears and choose the option AirDrop. Then, indicate the recipient from the AirDrop panel that is shown on the screen and press the button Send. Alternatively, you can drag the file onto the recipient icon attached to the AirDrop window seen above.
- From iPhone to Mac - after opening the file of your interest, press the icon of sharing (a square with an up arrow), tap the option AirDrop that appears in the panel shown on the screen and selects the recipient (i.e. the Mac) from the following screen.
To learn more about AirDrop and how to use it, I invite you to read my guide on how AirDrop works, in which I was able to deal with this topic in great detail.
iCloud
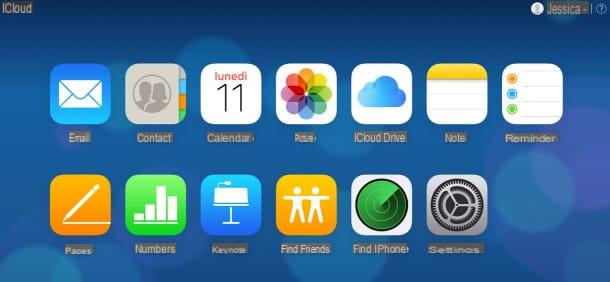
Another great way to exchange files between computers and iPhones completely wirelessly is to use iCloud: if you have never heard of it, this is the cloud service designed by Apple, useful for saving and sharing documents generated through compatible apps (such as Numbers, Pages, GarageBand and so on), photos, videos between multiple devices , notes, emails and reminders.
Usually, iCloud is activated during the first configuration of the iPhone: to verify that this has happened on your phone, tap the button Settings placed on the home screen of the "iPhone by", tap on yours name and surname to access the Apple ID settings and then press on the item iCloud. At this point, check that the levers corresponding to the apps you are interested in synchronizing (and whose data you are interested in sharing) are active, otherwise do it manually.
After the configuration phase of the iPhone, you can access the files in a very simple way through the browser of the computer you have available, using the iCloud Web service: connected, therefore, to its main page, enter the login credentials of your Apple ID (if you don't remember them, you can easily retrieve them by following the instructions I gave you in this guide) and, if applicable, follow the instructions provided on the screen to enable the browser via two-factor authentication.
At this point the game is done: through the console displayed on the next screen, you can easily access your contacts, photos, videos, files and whatever else is stored on the iPhone, with the possibility of downloading files or uploading them. of new ones, without the need to use the Lightning cable.
For your information, iCloud is also available in the form of a "desktop" program for Windows and macOS (on the latter operating system it is even installed "as standard"): I have explained to you in detail how they work, together with other details relating to the service in question, in my guide on how to use iCloud.
Other cloud services
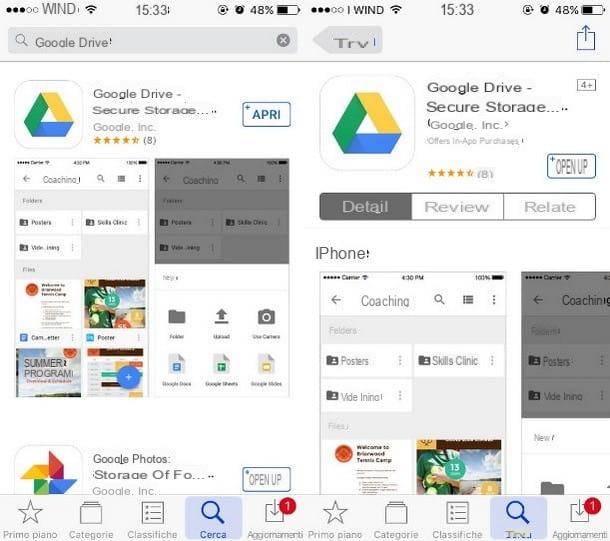
Exactly as already seen above, there are numerous cloud services compatible with the iPhone, which can be used to connect the Apple smartphone and the computer, without the need to use cables of any kind (and, even, without necessarily having to connected to the same network): in this regard, I invite you to consult the section dedicated to cloud services for Android, in which I have already had the opportunity to provide you with precise information on this.
If you have come this far, it means that you have acquired the necessary skills to connect the phone to the PC without a cable, using one of the methods that I have given you in the course of this guide. For completeness of information, however, would you like a complete overview of the connection methods between smartphone and computer that involve the use of the classic "cable", so as to decide independently whether or not to get one? No problem.
What I advise you to do is read in depth my guide on how to connect the phone to the computer, in which I was able to show you numerous other connection techniques, many of which involve the use of the beloved and hated cable. Trust me, you won't regret it!
How to connect your phone to your PC without a cable


