IOS devices (iPad, iPhone) have an integrated app "iBooks”Which allows users to download or purchase books and PDFs directly to their iPhone or iPad. If you are a reading lover you may have downloaded too many books and you may now have difficulty managing them. In this case, it is better to “clean” the iBooks app by deleting those books you no longer need. But how to do this? Like delete a book from iBooks on iPhone and iPad quickly and easily?
Keep reading this article as we will show you several ways to delete books in iBooks without problems.
Way 1. Remove book on iBooks manually
Do you know that you can remove books from iBooks on your iPhone or iPad manually too? It is very simple and you just need to follow these steps described below.
Step 1. Open your iPhone or iPad, then find and launch the app iBooks on your iOS device.
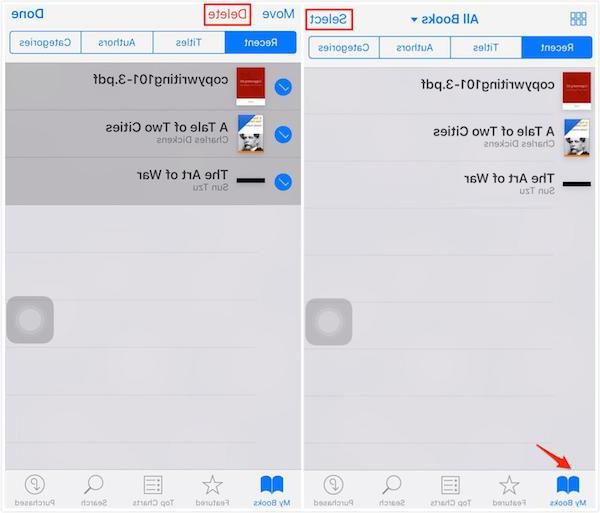
Step 2. At the bottom of the screen you will see the option "My books“. Click on this option.
Step 3. When you are in the "My Books" screen, you will notice the "Select" button, located in the upper right corner of the screen. Just tap "Select" to choose the books to delete
Step 4. After selecting the book (s) to be deleted from iBooks, tap the "Delete". When you tap "Delete" you will be able to choose between "Delete" and "Delete this copy" to get the desired result.

Note: By choosing the "Delete" option, the selected books will be "hidden" and will no longer be available in your iBooks app. If you want to read these books again you will need to go to the "Purchased" section to download them again. If you choose the option "Delete this copy" instead, the books you decide to delete will be deleted from the device but will still remain in your iCloud. You will be able to identify these books by the iCloud icon.
Way 2: Erase iBooks books via iTunes
Besides the direct and manual deletion of books from iBooks on your iPhone or iPad, you can also do this with the help of iTunes. It is known to all that syncing books with iTunes will erase existing books on your iPhone or iPad. Therefore, if you want to delete all books or some books from iBooks, you can choose to use iTunes. Follow these steps to understand how to delete iBooks from iPad or iPhone via iTunes.
Step 1. Connect your iPhone or iPad to computer via USB cable. Make sure iTunes is already installed on your computer.
Step 2. Launch iTunes on your PC and wait for it to automatically detect the iOS device.
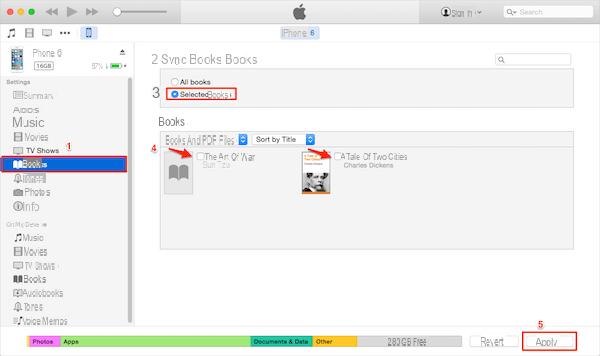
Step 3. When you see the iOS device in iTunes, click the "Device" button and select the "Books" from the list on the left.
Step 4. Now choose "Synchronize book". If you want to remove all books, you need to select “All books”. Otherwise, choose "Selected books".
Step 5. After that make sure you deselect all the books. Finally, click on "Apply”To remove books from iPhone and other iOS devices with iTunes.

Way 3: Delete Books from iPhone / iPad with FoneTrans
If you are looking for software to better manage the books on your iOS device, directly from your computer (Windows or Mac), below you will find a very interesting software solution. We are talking about the program FoneTrans, a program that can help you manage not only books but also photos, music, videos, contacts and SMS directly from your computer. We have already seen this software at work in the guide on how to export iBooks books from iPhone to PC / Mac. To know how instead delete books in iBooks from iPhone, iPad with this program, follow these steps.
Step 1. Download and install FoneTrans
First of all, download FoneTrans in demo version from the buttons below:


Step 2. Connect iPhone or iPad to computer
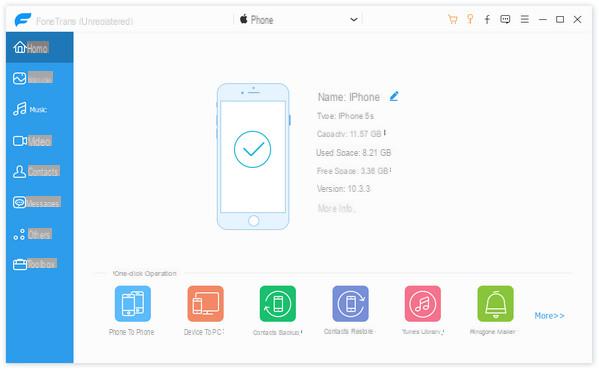
Launch FoneTrans after installation. Connect your iOS device to computer via USB cable. As soon as detected you will see the device information in the program.

Step 3. Delete Books
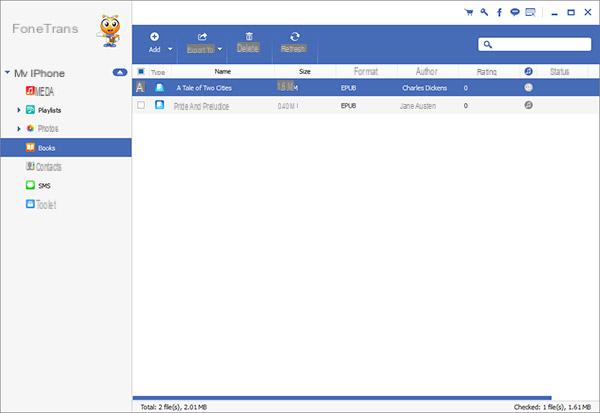
After FoneTrans recognizes your device you can select "Books" from the menu on the left. Once this is done, all the books currently saved in the memory of the iPhone or iPad will appear on the program screen.

Now you just have to select the books you want to delete and then click on the button at the top DELETE. That's all!


