When it comes to take pictures, the best camera is the one you have at your fingertips and that is the smartphone camera. Today's smartphones have the best cameras with high resolution. If you have an iOS device it is very likely that you have many photos saved on your iPhone / iPad and that you also use iCloud for storing them. Thanks to iCloud you can avoid taking up too much space in the device memory and you can access your photos online at any time through your Mac or Windows computer or through your iPhone, iPad or iPod Touch.
iCloud is therefore the best option available to store and access photos at any time. You just need an Apple ID and an Internet connection! Access and the viewing photos on iCloud it's quite simple and in this article we show several ways to log in and view photos on iCloud.
1. Access and View Photos on iCloud from iOS devices
Step 1. Dal iOS device (es. IPhone) vai su “Settings"And then click on"iCloud". Tap “On / Off” to set iCloud to ON and enter your verified Apple ID. Activate the "Photo stream”To view the photos on iCloud
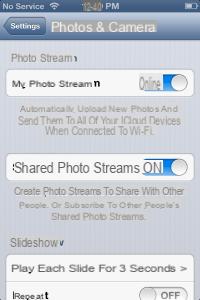
Step 2. The next step is to open the “Photos” app from the main screen. You will see a “Photo Stream” button on the screen. Tap on it to start Photo Stream.
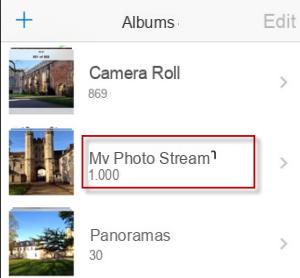
Tap "My Photo Stream”To see the photos you have uploaded.
Pro:
> Simple and short process
> No data loss
2. View Photos on iCloud from PC
1 phase: To use iCloud on your Windows computer, you need to install it first. So first download and install iCloud for Windows.
Step 2: When you're done installing iCloud, launch the iCloud Control Panel and enter your Apple user ID and password. You can only create your ID if you have an Apple iOS device or a Mac running OS X Lion or later. You will need an Apple ID to use iCloud.
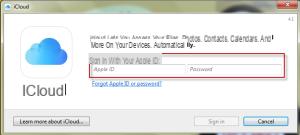
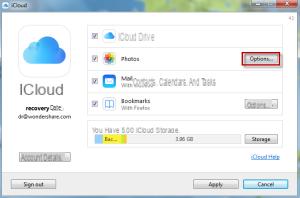
Phase 3: After entering your user ID and password, click on the checkbox "Gallery”To activate the photos on the screen. Click "Options" to select the photo option. Don't forget to turn on the “Shared Photo Streams” option to see photos shared by other people.
Pro:
> Easily synchronize data with your computer.
> One place for all data.
3. View Photos on iCloud from Mac OS X
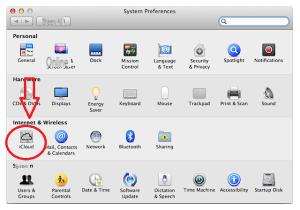
1 phase: First, select "System Preferences" from the Apple menu on your Mac and then click on "iCloud". Click the "Photo Stream" checkbox on the screen and click "options”And then activate both“ Photo Album ”and“ Shared Photo Streams ”.
2 phase: Now start iPhoto o Aperture. Click "iPhoto" or "Aperture" at the top of the screen and select "Preferences". Click the "Photo Stream" tab and select the option of "Photo Stream" and "Shared Photo Stream."

3 phase: To view the photos, select “Photo Stream” from the main iPhoto or Aperture window.
Pro:
> Fast synchronization
> Simple to do
Against:
> iCloud isn't great for doing full syncing, but it's great when it comes to photo transfer
4. Using dr.fone for iOS to View iCloud Photos
Dr.Fone per iOS (iPhone Data Recovery) is the best iPhone / iPad data recovery solution available in the market. It allows you to recover lost data directly from iOS devices or recover files from iCloud or iTunes backups. It is compatible with the latest iOS versions, and with all iPhone models such as iPhone 6s, iPhone 6 Plus, iPad 2 and iPad Air. Let's try to understand how it can be used to recover photos from iCloud backup or just to view them. Download the PC or Mac version from the following buttons:


Home screen:

Step 1. Choose the recovery mode
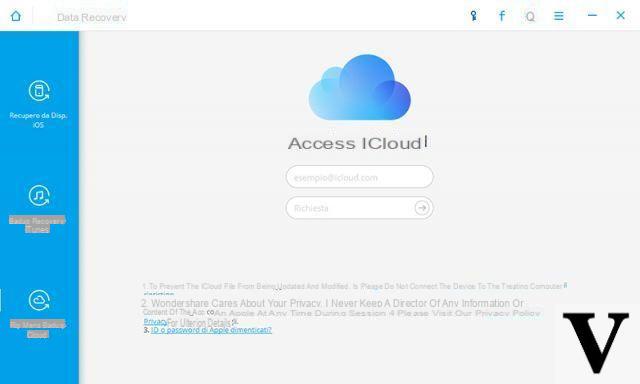
Run dr.fone for iOS and click on the DATA RECOVERY function. Then, from the left sidebar, choose the recovery mode "Recover from iCloud Backup". A new window will appear where you will need to enter your iCloud account and password to log in. Your information is highly protected and no data is sent or read by third parties.
Step 2. Download the iCloud Backup file
Once you log into iCloud, the program will be able to find all iCloud backup files in your account. Choose the one that contains the photos to view or recover and click on the "Download".
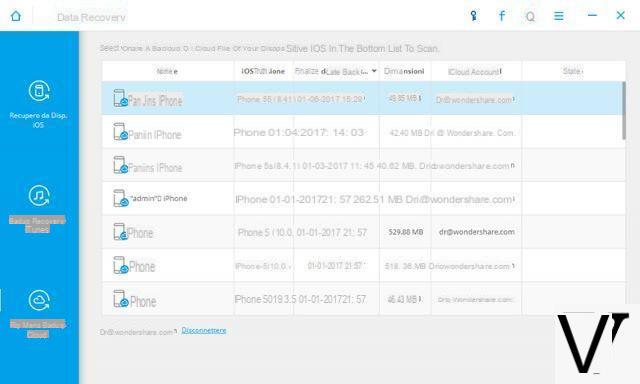
In the window that appears later you can choose the type of file to download. This saves time in the process of downloading the backup file from icloud. After the download you can scan the contents of the backup by clicking on the "Scan"
Step 3: Viewing and Retrieving Photos
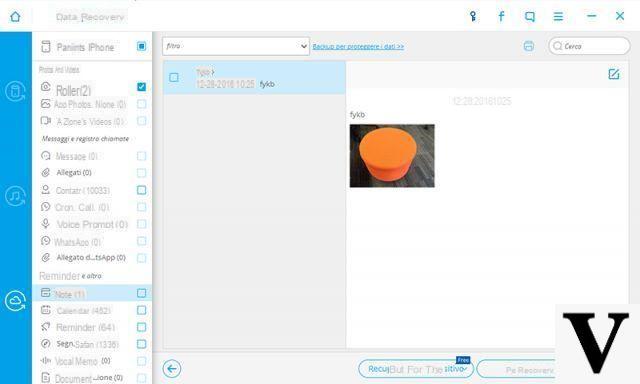
Once the scan is complete you will be able to preview almost all the data in the iCloud backup file, including contacts, messages, photos and more. Select the desired files and click the "RECOVER”To save them on your computer.
