Interest of a VPN
Setting up a virtual private network allows remote computers to be connected securely through an unreliable link (Internet), as if they were on the same local network. This process is used by many companies to allow their users to connect to the corporate network outside of their workplace. It is easy to imagine a large number of possible applications:
- Remote and secure access to the local (company) network for mobile workers;
- Secure file sharing;
- Local network play with remote machines.
- ...
Simple method
If you only want to create a small VPN "among friends" to be able to play a network game for example, you just need to install software such as Hamachi.
For Windows 7 and Windows Vista
VPN server
Open Control Panel, then select (System and Security, then) Administrative Tools. and then double click on Services. 
Activate the Routing and Remote Access service by right-clicking, then Properties. In type of start-up, put Automatic and click on Start. 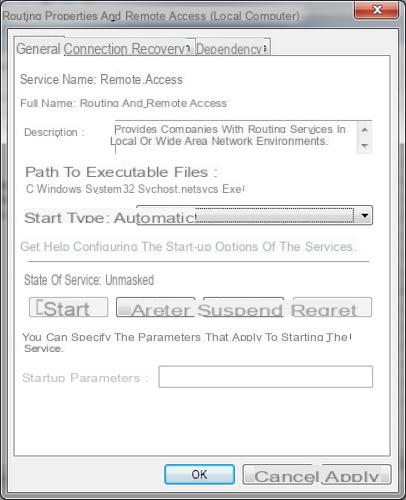
Still in the control panel, click on "Network and Internet", then on "Network and Sharing Center". Choose "Modify the card parameters".
The "Incoming connection" item should appear. 
Right-click on it, then choose "Properties" and finally in the general tab check the box "Allow other users" in the VPN box. 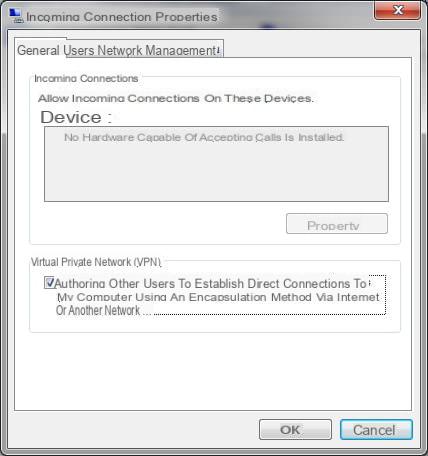
Access rights can be defined using the "Users" tab. 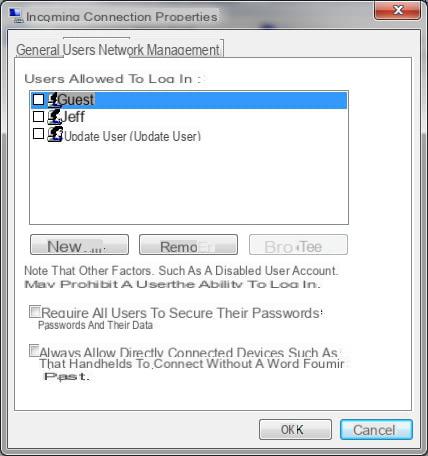
Client VPN
In the control panel, click on "Network and Internet", then on "Network and Sharing Center". Choose "Configure a new connection or a new network".
Click on "Connect to your workspace". When Windows asks "How do you want to connect?", Choose "Use my Internet connection (VPN)" and enter the address of the server to which you want to connect and define a destination name (the one of your choice). No box should be checked. Then click on Next. Enter your username and password on the remote system (you must have created an account for this user).
In Windows XP
Windows XP can natively manage small virtual private networks, suitable for small business or family networks (called SOHO, for Small Office / Home Office).
Thus, to set up a virtual private network, it suffices to install a remote access server (VPN server) accessible from the Internet at the level of the local network and to configure each client to allow it to connect to it.
VPN server
In our example we will assume that the machine intended to act as a VPN server on the local network has two interfaces; one intended for the local network (a network card for example) and one intended for the Internet (an ADSL or optical fiber connection for example). VPN clients will connect to the local network via its interface connected to the Internet.
In order to allow this machine to manage private networks
virtual connections, just open the Network Connection item in Control Panel. In the opened window, double-click on New connection wizard:

Then press the Next key:
Among the three choices offered in the window, select "Configure an advanced connection":

In the following screen select "Accept incoming connections":

The following screen shows devices to select for direct connection. No peripheral device may be offered. Unless there is a special need you will not need to select any: 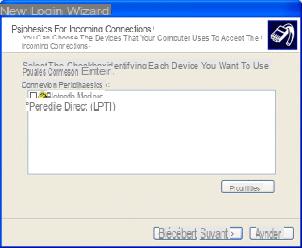
In the next window select
"Allow virtual private connections": 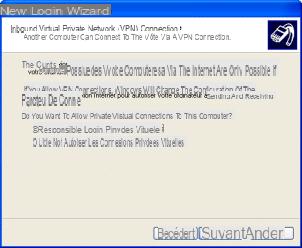
A list of system users appears, all you have to do is select or add the users authorized to connect to the VPN server: 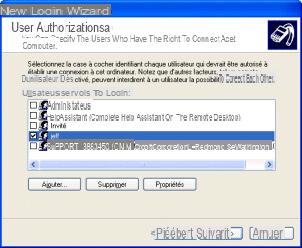
Then select the list of protocols authorized via the VPN: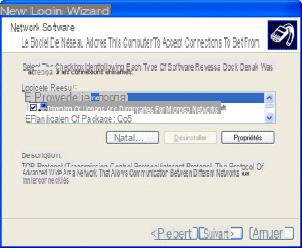
Clicking on the Properties button associated with the TCP / IP protocol allows you to define the IP addresses that the server assigns to the client for the duration of the session. If the local network on which the server is located does not have a specific addressing, you can let the server automatically determine an IP address. On the other hand, if the network has a specific addressing plan, you can define the address range to be assigned: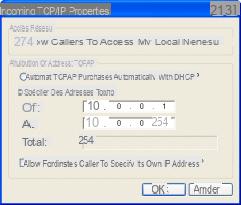
The configuration of the VPN server is now complete, you can click on the Finish button:
Client VPN
In order to authorize a client to connect to your VPN server, you must first define all the connection parameters (server address, protocols to use, etc.). The new connection wizard available from the Network connections icon in the control panel allows this configuration:
Then press the Next key:
Among the three choices offered in the window, select "Connection to the company network":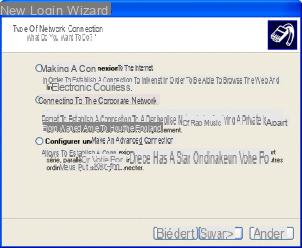
In the following screen select "Virtual private network connection":
Then enter a name that best describes the name of the virtual private network to which you want to connect:
The next screen is used to indicate whether a connection must be established before connecting to the virtual private network. Most of the time (if you are on a permanent connection, ADSL or cable access) it will not be necessary to establish the connection since the computer is already connected to the Internet, otherwise select the connection to be established in the listing :

In order to access the remote access server (VPN server or host) it is essential to specify its address (IP address or host name).
If this one does not have a fixed IP address, it will be necessary to equip it with a dynamic naming device (DynDNS) capable of assigning it a domain name and of specifying this name in the field below:

Once the definition of the VPN connection is complete, a connection window asking for a username (login) and a password opens to you:
Before connecting, it is necessary to make some settings by clicking on the Properties button at the bottom of the window. A window comprising a certain number of tabs thus makes it possible to configure the connection more finely. In the Network Management tab select the PPTP protocol from the drop-down list, select the Internet protocol (TCP / IP) and click Properties: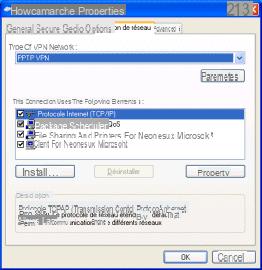
The window that appears allows you to define the IP address that the client system will have when connecting to the remote access server. This makes it possible to obtain addressing that is consistent with remote addressing. The VPN server is thus capable of acting as a DHCP server, that is to say of automatically providing a valid IP address to the VPN client. To do this, simply select the option "Obtain an address automatically":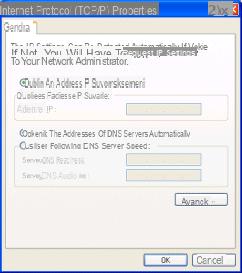
If the client uses the DHCP server, if the server assigns it an internal IP address, the client will then be connected to the corporate network and will be able to access its resources but will no longer have access, by default. to the Internet via the interface used because the IP address from which it will benefit is not routable. In order to allow the client to be connected to the VPN and to have access to the Internet via this connection, the VPN server must be configured in such a way as to share its Internet connection! So the Advanced button allows you to make sure that the client is using the VPN server's gateway. in the event that the latter's connection is shared :

To be able to set up the VPN connection, the intermediate firewalls, in particular the native Windows firewall, must be configured in such a way that the connection can be established. Thus, it is necessary to deactivate the native Windows firewall as follows:
- In the control panel click on Network connections,
- Right-click on the connection you are using,
- Select the Advanced settings tab,
- Make sure the Internet Connection Firewall option is turned off.
More information
For more information on virtual private networks, do not hesitate to consult the page
dedicated to this topic. For any questions, you can use the CCM forum.
Article written by [mailto: webmaster@Idroid.com Jean-François PILLOU]


