 Here is a trick to create a bootable USB key and install Windows XP from this key.
This is very useful especially for Netbook users but also for any other computer user who does not have a CD player.
I'm just going to reveal the key creation part with Windows XP without addons, but be aware that multiple options are possible such as adding Linux, UBCD4WIN or Service Pack.
Loading your video "FAQ: install windows xp with a usb key"
Prior
To get started you will need:
- A 1 or 2 GB USB key.
- An official Windows XP CD in the desired version.
- A computer containing a CD player and a USB socket (to create the installation USB key).
- A computer on which we will install Windows.
- And the wonderful WinSetupFromUSB software.
It will also be necessary that:
- Your USB key can boot.
- Your machine accepts booting from your USB key (check in the BIOS).
- Your key is fast enough to avoid slowness when installing Windows XP.
With FlashBoot
Creation of the USB key
Download Flashboot
Once downloaded, launch the software installation and follow the instructions. At the end of the installation, start the software with administrator rights (right click => run as administrator).
You should come across a page like this:
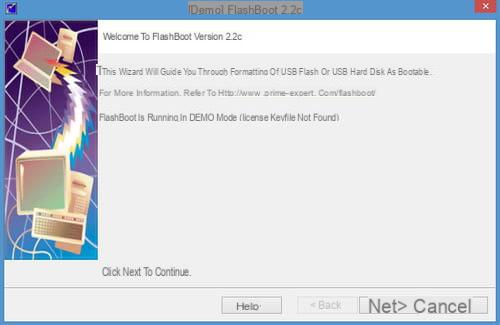
Click on "Next", a new page will appear where you can choose from which device you are going to convert.
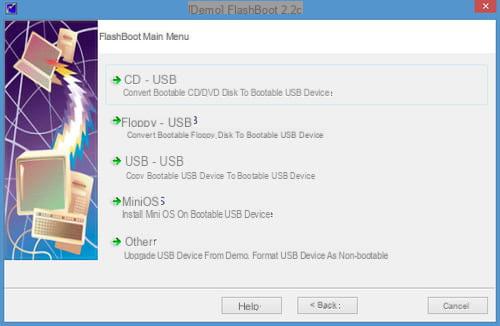
After making your choice, click on "Next". The next page will ask you which CD / DVD or Image file you want to convert from. (We will take the CD / DVD method here as an example.)
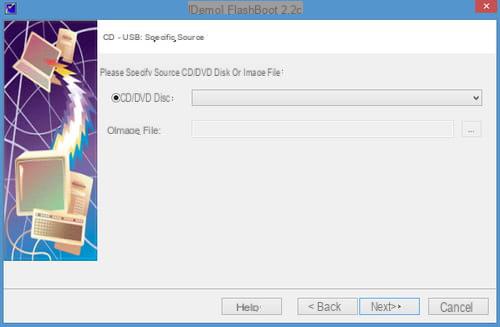
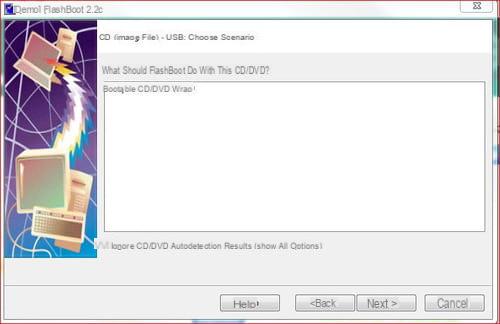
Once you are satisfied with the method you have chosen, click again on next. The next page is about what FlashBoot will do with your Cd / DVD or image. Choose "Bootable CD / DVD Wrap" and continue.
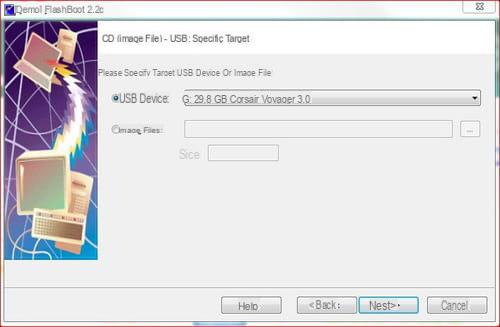
The following step will allow you to choose on which USB medium you will want to boot. Nothing rocket science here, choose your key and click "Next".
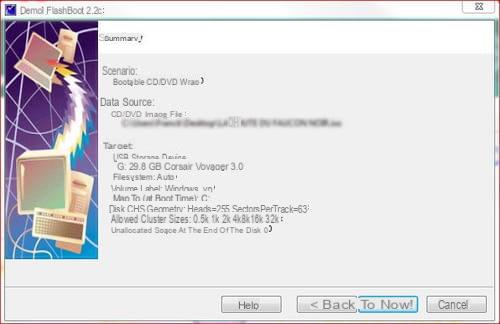
In this last page, you will have access to a summary of the previous steps. If everything is fine with you, just click on "Format Now!" to start formatting the key.
Remember to wait until the end of copy procedure is finished before closing the software.
Windows XP installation
Let's move on to installing XP. Nothing extraordinary except that it takes place in 3 steps:
- First connect your key to your Netbook and go to the BIOS
- Then configure your BIOS so that your PC boots on the USB key;
- Once done, save and restart your PC;
- There you will have two lines of the GRUB menu;
- The first will be to choose the start of the installation;
- The second line will be for the rest of the installation and the first start of Windows XP;
- It will therefore be necessary to boot from the USB key until Windows XP is fully installed.
- Follow the installation instructions as for a normal installation
Now your Windows XP is installed with your USB key!
Avec WinSetupFromUSB 0.2.3
Creation of the USB key
The download link: WinSetupFromUSB
- Once downloaded, launch the software installation and follow the instructions (accepting the creation of a folder). At the end of the installation, click on the icon of WinSetupFromUSB, on the desktop.
- WinSetupFromUSB starts up.
- In the first field, choose the folder containing the XP installation files (usually the CD drive).
- In the second field, select your USB key or click on refresh if it is not yet present.
- Check that the option Removable is correctly selected, you must have the same parameters as in the image below:
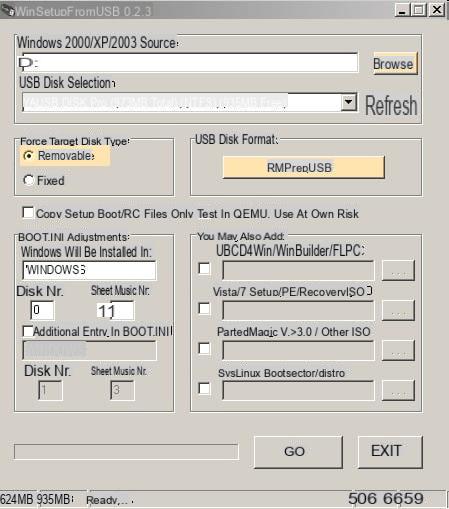
- Click on RMPrepUSB.
- Choose option NTFS.
- Choose option Boot as HDD (2PTNS).
- Choose option XP Bootable (NTDLR).
- In the end, you must have the same settings as the image below:
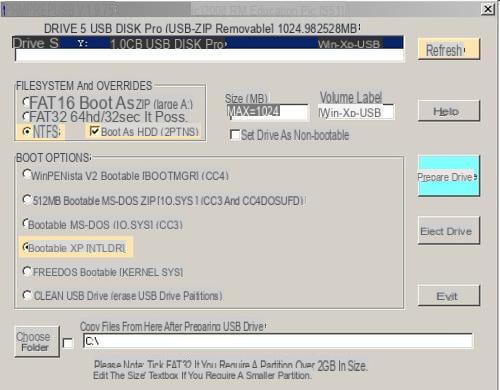
- Click on Prepare Drive to format the USB flash drive.
- Click on OK for the following messages. Key formatting starts.
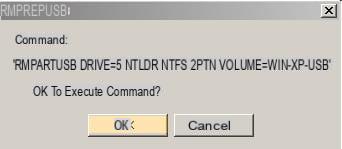
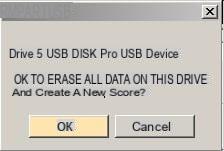
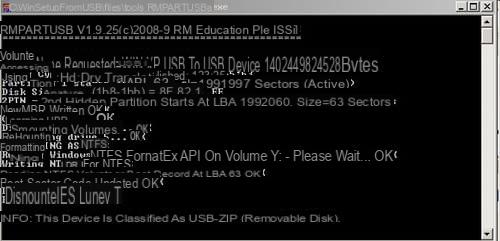
- The USB stick is formatted. Click on Exit to return to the WinSetupFromUSB screen.
- Click on KATEGORIEN and choose the path of the Windows XP installation disc.
- In USB Disk Selection, select your USB Key (press Refresh if it is not already present).
- In Force Target disk type, select Removable.
- Click on GO to start the copy on the USB key. Be patient ;)
At the end, a message in English informs you that you will have to start on your USB key TWICE, in text mode (First Part of Windows XP setup) and in graphical mode (Second Part of Windows XP setup).
When the graphical installation mode is finished, you will be able to remove your key and boot from the hard drive.

Windows XP installation
- First, connect your key to your computer and go to the BIOS.
- Configure your BIOS so that your computer starts on the USB key.
- Once done, save and restart your PC.
- In the bootloader (GRUB4DOS), choose Starter.
- Choose the first part of the installation (First Part of Windows XP setup) with the directional keys then validate with the Enter key.
- After copying the files, boot a second time on the USB key and select the second part (Second Part of Windows XP setup).
- Follow the installation instructions as for a normal installation.
Your Windows XP is installed!
Note:
After installation, Windows can ask each startup what to launch:
Please select the operating system to start:
- Microsoft Windows XP Home Edition
- USB Repair NOT to Start Microsoft Windows XP Home Edition
The safest way to remove this choice is to go to Start / Control Panel / System. Go to the Advanced / Startup and recovery tab then uncheck the Display the list of operating systems for ... option.
Do not hesitate to ask your questions in the Windows forum ;-)


