Summary
- > Record FaceTime on Mac
- > Record FaceTime on your iPhone or iPad
- > Record iPhone Screen with Mac
FaceTime video calls are a great way to stay close to loved ones. However, it is a pity that these ephemeral videos and conversations cannot be preserved.
Integrating such a feature could be practical for creating a podcast or even saving a professional video call.
Despite this shortcoming, even if they are not integrated, there are other ways to record your video calls via FaceTime. In this article, we suggest three methods for you to apply on iPhone, iPad or Mac.
Record FaceTime on Mac
Your Mac is the perfect device to make and record a FaceTime call, especially if it's a group call.
However, which registration method to use will depend on the macOS version you have.
If your operating system is Mojave or Catalina, then you will benefit from the Screen Capture feature.
On the other hand, if your macOS runs under an older version such as Sierra, then you will have to go through QuickTime.
Before capturing your exchanges, note that it is essential to ask the consent of your interlocutor.
Record a FaceTime call in Mojave or Catalina
The Screenshot feature first saw the light of day on Mojave. Thanks to this, you can record the image and sound of your Mac.
To do this, follow these 5 steps:
- Open the snipping tool by tapping Cmd + Shift + 5.
- From the options that appear, choose between Record full screen et Save the selected part.
- To capture sound, click Options and select Built-in microphone, otherwise the audio will not be taken into account.
- Click on Save.
- When the communication is finished, click on Stop which appears in the menu bar at the top right.
You will find the FaceTime video on your Desktop.
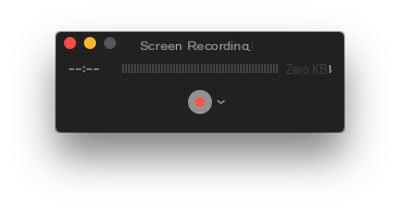
Record a FaceTime call with QuickTime
Your macOS does not work under Mojave or under Catalina? You will then need to use the built-in QuickTime application.
- Press the keys Cmd + Space and search QuickTime.
- Open the app.
- From the menu bar, select files → New screen recording.
- Visit Options, then choose a microphone.
- Click on thered button icon.
- To start full screen recording, click anywhere on the screen.

When you're done, click the icon in the menu bar, or right-click on QuickTime and select Stop recording.
Your video will then appear in a window, select File → Save.
Record FaceTime on your iPhone or iPad
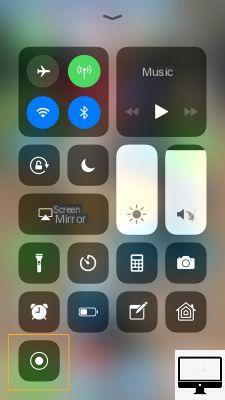
Since iOS 11 update, Screen Recording feature has been added to Control Center of iPhone and iPad. However, for some unknown reason, the audio cannot be saved.
Before you start, make sure the option is available in your shortcuts. To do this, open the Control Center by swiping down the screen from its corner and make sure you have an icon of two white circles.

If it does not appear, then go to Settings → Center de contrôle → Customize orders. Next, tap the + sign next to Screen Recording.
Now, to back up your FaceTime:
- Open the control center.
- Touch the icon Screen recording.
- Start your call.
- Once done, reopen the control center and tap the record icon again.
Your video will be automatically placed in the app Photos.
Record your iPhone screen with a Mac
If you wish, it is also possible to record your iPhone screen directly from your macOS. To do this :
- Connect your iPhone to your Mac.
- Open the application QuickTime Player.
- Go to File → New video recording.
If prompted, allow access to the camera with OK - Click onred button icon.
- Start your FaceTime call on iOS.


