The recovery of deleted photos from devices Samsung or, in any case, from any Android device, it could be the only thing you think about after accidentally clicking on “delete” or having done a too hasty restore of your Samsung phone. Samsung devices are the most used and popular devices in the world and for this reason we receive a lot of support requests related to this problem and that is the possibility of recover deleted photos on Samsung.
In such cases, we often find ourselves searching the Internet for keywords such as “Samsung Photo Recovery” or “recover deleted photos from Samsung“. We have actually already discussed the topic extensively in the guide on how to recover deleted photos on Android, but below we will be more specific and see what you can do if you have a SAMSUNG mobile or tablet.
Here is the index of the article:
- > Can deleted photos be recovered on Samsung?
- > What to do immediately after deleting photos on Samsung
- > How to recover photos from Samsung
Can deleted photos be recovered on Samsung?
Okay, it's time to get busy and figure out how to recover the precious photos that you have deleted from your Samsung! As I surely know, photos can be saved in one of two locations depending on your phone settings:
- Internal Memory phone (similar to your computer hard drive)
- External memory (SD card)
What you may not know is that if you delete a photo (from internal memory or memory card) it it is not deleted completely. Why does this happen? You need to know that deleting involves two steps:
- Delete ONLY the file system pointer that points to the memory sectors containing the file (the photos in this case)
- Delete the sectors that contain the photo.
When you press "remove“, Only the first step is performed. The memory sectors containing the photo are marked as “available” and are considered free to store a new file.
Why is the second step not performed?
The first step is quick and easy. However, it takes much longer for the second phase of cleaning up the sectors (almost equal to the time it takes to write that file to those sectors). Therefore, for best performance, the second step is only performed when those “free” sectors need to store a new file. Basically, this means that even when you think you have permanently deleted the files, they are still available in the memory (internal or SD card) of your mobile phone.
What to do immediately after deleting photos on Samsung
Here's what to do (or not to do) as soon as you realize you've deleted photos from your Samsung:
- Do not add or delete data from your device. This will prevent the data from being overwritten. If at some point your data is overwritten, you will not be able to recover the lost photos.
- Disable connectivity options such as Bluetooth and Wi-Fi. Some apps tend to automatically download files when connected to the internet via these options.
- Avoid using the telephone until the photos were recovered. In order to ensure that no new data is uploaded to your device, your best bet is to stop using the device completely until you restore the necessary photos and files.
- Use one photo recovery tool Samsung. We recommend using dr.fone - Android Data Recovery which is among the most powerful and effective on the market.
How to recover deleted photos on Samsung
Dr.Fone per Android is one of the most powerful software that can recover deleted photos on Samsung.
The first thing to do is to check both the device and the external memory card. If you are pretty sure that the photos are nowhere to be found and have been deleted, then it's time to use dr.fone. Here are some features of this amazing program:
- Recover Android data by directly scanning your Android phone and tablet.
- Selectively preview and recover what you want from your Android phone and tablet.
- It supports various types of files, including WhatsApp messages, Messages and Contacts, Photos, Videos, Audio and Documents.
- It supports over 6000 Android device models and various Android operating systems.
Click on the following button to download the demo version of dr.Fone for Android:

If you have a Mac OS X go to Android Data Recovery for Mac
Step 1. Connect your Samsung to the PC
Immediately after installing and launching dr.fone you will see this splash screen:
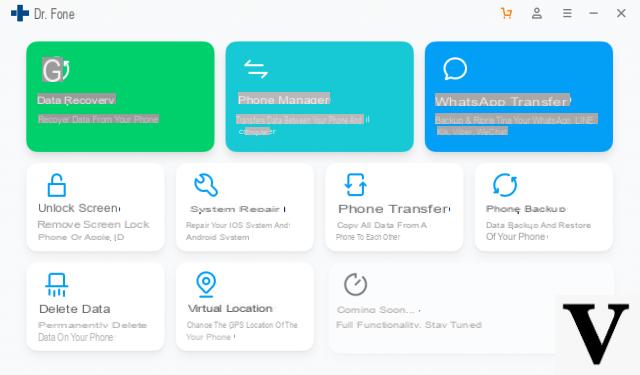
Click on the function "RECOVERY"And then a new window will open asking you to connect the mobile phone to the PC via USB:
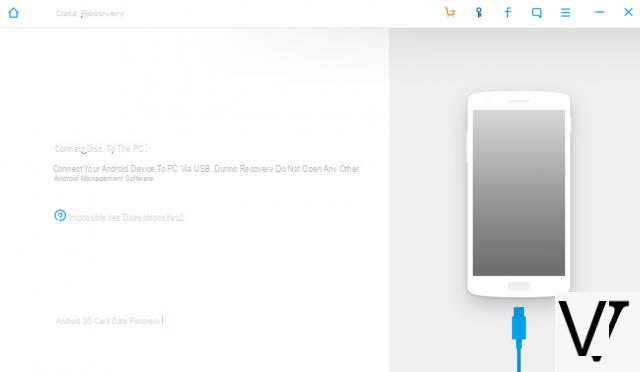
Step 2: Enable USB Debugging on your Samsung
An important operation to do in order for dr.Fone to analyze the memory of your Samsung is to activate the USB Debugging option on the mobile. It is very simple to activate this option: go to “Settings” <Press “Phone Info” <Select “Version number” several times until a message like “You are in developer mode” appears.
At this point go back to "Settings"> Click "Developer Options" and search and tap on the option “USB debug” to activate it.
Step 3: Scan Samsung memory
Once the USB Debug mode is activated on the Samsung, check the screen of your Samsung to confirm the operation and then from the program choose the data to search. In our case you can only select "Gallery”To search for all lost photos.
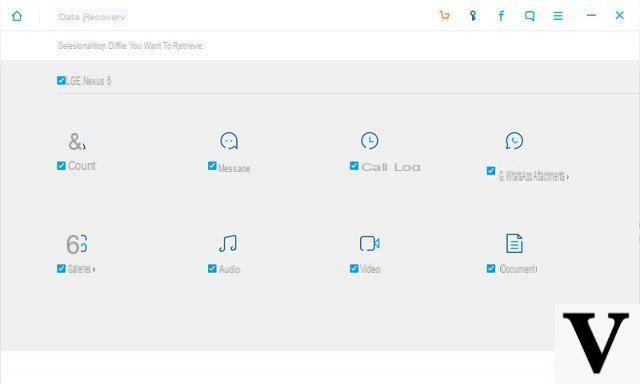
Click on NEXT to start scanning. This scan will take several minutes. At the end you will finally be able to preview all photo found in the memory of your Samsung and which are still recoverable thanks to this program.
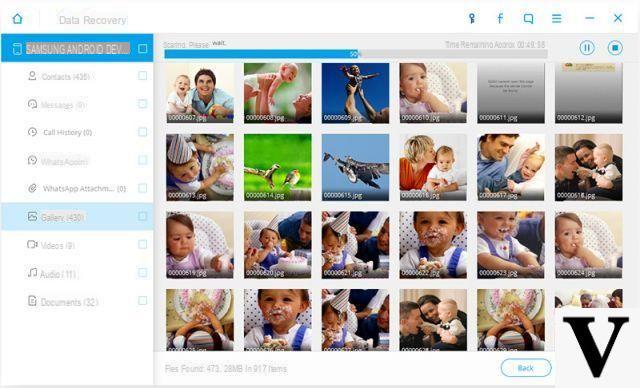
Step 4: Deleted Photo Recovery
Choose the photos to recover and finally click on "RECOVER”To save them on your PC.
Once saved on your PC you can open the photos with any photo viewing program such as Photo Viewer, a free software designed to open any photo and image on your Windows PC.
If you have problems in photo recovery because you can't get root permissions on your Samsung, rely on this other program:
https://www.softstore.it/recupero-file-android-senza-root/


