Thanks to image disks in .ISO or .IMG format, physical disks for computers have become obsolete. Thus, under Windows 10, Microsoft offers a native functionality to easily mount, dismount or burn virtual disks without having to go through third-party software.

Until recently, to create, mount or unmount ISO images, it was necessary to use third-party software such as Daemon Tools, Alcohol 120 or MagicISO. Today, these apps are still useful for creating image files, but Windows 10's built-in Virtual Disk Manager makes it easy to mount, unmount, or even burn ISO files without having to use a third-party app. Note that this feature is available for all versions of Windows from Windows 8.
Windows 10: how to mount an ISO disk?
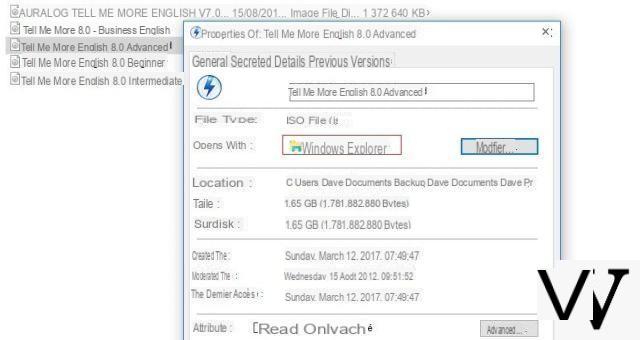
To mount an ISO disk with Windows 10, first start by setting Windows Explorer as default opening program for .ISO files. All you need to do is right-click on an .ISO file, then click properties. Then select Windows Explorer as the default opening application for this type of files on the General tab.

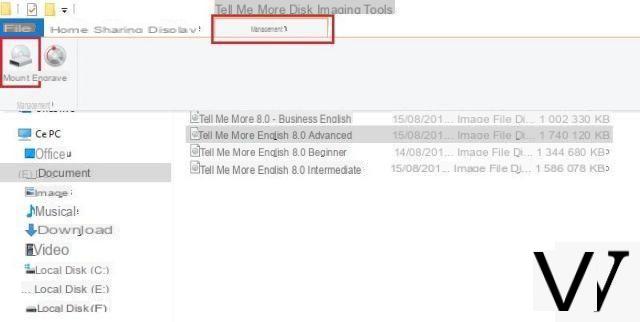
To mount an ISO file, you now have three different options. The first is to select the file and then click Manage> Mount from the menu at the top of the screen. Once mounted, the file will automatically open in Windows 10 virtual disk drive.

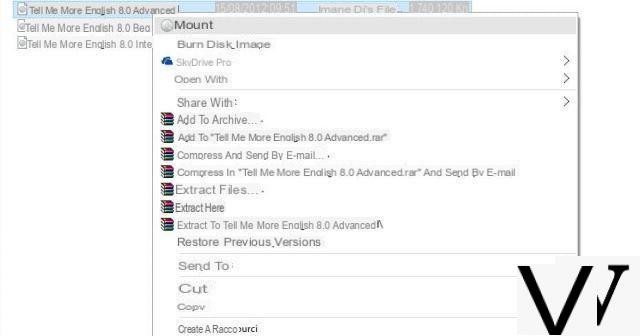
Even simpler, the second option is to right click on the ISO file, then click on mount. Finally, the third option is to simply double click on the ISO file to automatically open it in the virtual drive.

Windows 10: how to burn an ISO disc?
Since Windows 7, Microsoft's operating system allows you to burn an ISO disc to create a physical copy. Again, the process is very straightforward. Simply select the ISO file, then, in click Management> Burn from the menu at the top of the screen. Then follow the different steps indicated on the screen.
You now know how to mount, unmount or burn an ISO disc under Windows 10. This feature will be very useful to you, especially for emulating retro games like PlayStation games on Windows.


