To make formatting your documents easier, use styles! The predefined styles provided by Word are efficient and elegant, but you can also edit them and, of course, create new ones.
To format text in Word - as in other word processors for that matter -, you have the choice between two methods: punctually and manually modifying the font, its size - its "body" -, its variation - bold, roman, italic, underlined… -, its position - justified or centered -, line spacing, etc. ; or apply all these changes automatically and in a single operation. This is precisely the principle of styles.
In Word, a style is simply a collection of formatting and rules that apply a "format" to a piece of text (a title, paragraph, list, or even a single character). The advantage, in addition to the speed of application, is that you can find and use the same formatting in all your documents, which allows you to maintain a great consistency of presentation, while working quickly. Better yet, if you change a style in a document, the changes apply immediately and automatically to all elements that use it. Convenient ! Styles thus have many advantages, which we will discuss in this practical sheet.
What are Word styles used for?
Word provides several predefined formats called Styles for creating professional-looking documents with consistent formatting. The majority of Word's functions make use of styles.
These styles are in fact "associated" with your document and your computer through a style sheet. When Word loads a document, it looks at the style sheet for how to display headings, what font and size to display Normal style characters, and so on. Word's standard style sheet is called normal.dot (or .dotx, .dotm).
With styles, you no longer need to "hand shape" your titles by applying a larger font size, a different color, and a special alignment. You get the same result in one step by applying one of the predefined Heading styles.
You can create, edit, and apply the following types of styles:
- a paragraph style that controls all aspects of a paragraph's appearance, such as text alignment, tabs, line spacing and borders, as well as character formatting;
- a character style affecting selected text within a paragraph, such as text font and size, bold or italic formatting;
- a table style that gives table borders, shading, alignment and fonts a consistent look;
- a list style that applies similar alignment, numbers (or bullets), and fonts to lists.
How to customize Word's Normal style?
The Normal style is the style that is used by default by Word for text. If its characteristics (font, size, interval between paragraphs, etc.) do not suit you, just modify this style so that your preferences are taken into account for all your existing and future documents.
If you always want to write in Arial font, rather than Times New Roman which is the Normal style of some versions of Word, for example:
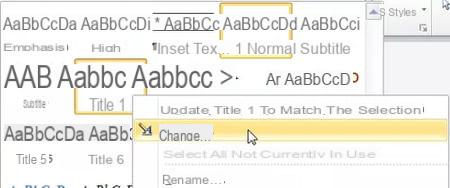
- Right click on the Normal style in the style gallery and choose Edit.
- In the Edit Style dialog box, choose Arial in the field Police and possibly adapt the size and color in the adjacent fields.
- If you find that your document is too compact, you can ventilate it by redefining the spacings of the Normal ...
- Still in the Edit Style dialog box, click the button Size in the lower left corner and choose Paragraph.
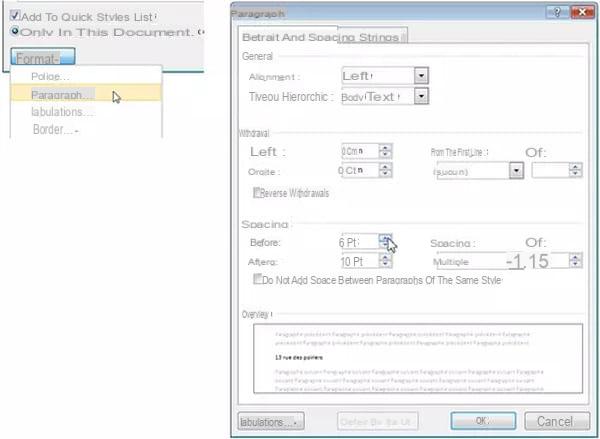
- Increase the values in the fields Front spacing et after. These two fields regulate the gap between two consecutive paragraphs. Not to be confused with fields Withdrawal above which adjust the left and right margins of the paragraph.
- Finish by checking the box New documents based on this template then clicking on OK.
- To know : Even if you open a document that was written last year, when it loads, Word will check the styles and show anything set to Normal style with the new settings. It also means that your document could be displayed in Mail or Comic Sans MS on other computers (hence the interest of the PDF format).
- Conversely, even if you allow yourself great fantasies in your styles (standard), know that your documents will resume a much more standard aspect when they are displayed on another computer (that of your boss, for example).
How to apply a style in Word?
Click the paragraph you want to format, or select all of the relevant paragraphs, and then do one of the following.
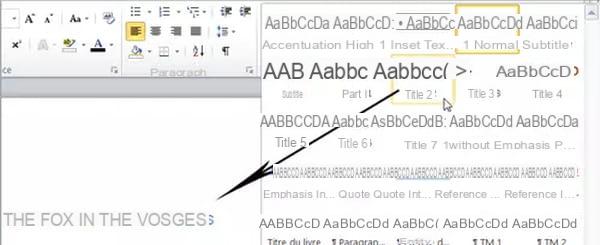
- Click on one of the styles offered in the ribbon styles gallery Home. The selected paragraph (s) instantly adopt this style.

- Click the arrow in the lower right corner of the Style group on the ribbon Home to display the Styles window with all the available styles. Click on a style in the list to apply it (feel free to use the cursor on the right, the list can be long!).
-
Hint: if your document is displayed in Page view, open the styles gallery by clicking on the arrow on the right then move the mouse pointer over the different styles: the text in the document will dynamically reflect the different hovered styles.
How to modify a style of Word?
Styles make it easy to format an entire paragraph, automatically applying a typeface in a defined body - a size -, lean, bold, italic, centered or justified, etc. It is much more practical to use than to manually change all these settings each time, especially since you can then change the parameters of a style so that they are immediately reflected in all the paragraphs that have it. adopted. This section shows you how to change a Word style in a particular document, or make the changes apply to all your future documents. There are two ways to modify an existing style: choose the one that feels most natural to you.
How to modify all the options of a Word style?
This first method allows you to modify all the options and formatting kept in a style.
- Right-click on one of the styles from the style gallery and choose Edit from the local menu.
- Make the necessary changes in the Edit Style dialog box, observing the result in the central preview area.
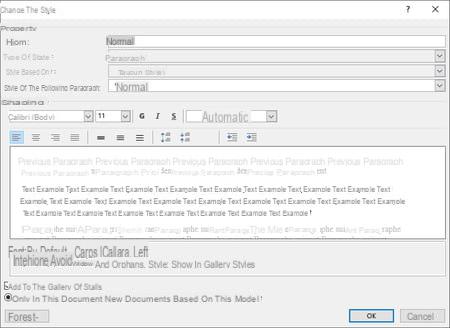
- These are the options in the Edit Style dialog box (some options are not present in all versions of Word):
- Properties section:
- Name: modify it to possibly create a new style. Always choose descriptive names, it may save you time later.
- Style based on: refers to the base style. This means that the current style will reproduce a number of characteristics of this basic style. If you change some of the characteristics of the latter, all the styles that are derived from it will also be transformed. For example, if you change the font from the normal style to Calibri, all associated titles will change to Calibri. This simplifies the modifications and allows to obtain a certain consistency between styles.
- Next paragraph style: A style that Word automatically switches to when you press Starter. For example, when you enter a title (in Title 1 or Title 2 style ...), you switch back to Normal style as soon as you press Starter. On the other hand, in Normal style, you stay in this style from one paragraph to another. It makes sense and it saves time.
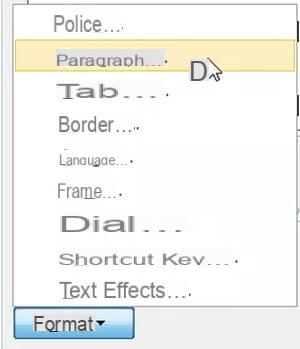
- Formatting section: in this section you will find all the formatting tools of the ribbon Home. Use them by observing the result in the preview area. If you want to change less common options, click the button Size in the lower left corner of the dialog box. Choose one of the options from this menu to open the dialog box of the same name with the detailed characteristics. Note that you can associate a language with a style, and even text effects!
- Add to Quick Styles List (or Add to Style Gallery): check this box if you want to display the style in the Ribbon Style Gallery Home.
- Update automatically: If you select this check box, Word automatically resets the style when you apply manual formatting to a paragraph that uses that style, and then click the style icon again. If you create a Current Text style with this box checked, for example, then you define in blue the color of the characters of one of the paragraphs of your document in this style, you just have to click again on the Current text icon in the gallery or the Styles window so that all the current Text style paragraphs of the document appear in blue! It's very handy for quick editing but it may surprise you if you do it by chance. In this case, as always, the right reflex is Ctrl-Z (cancel), then you think about the cause of the problem. Here, it consists of going to uncheck the Automatic update box in the style.
- Only in this document: check this box if the style changes only affect the open document.
- New documents based on this template: Check this box to apply the changes in all your future documents.
- Click OK to save the changes.
How to modify a style from an already formatted paragraph?
Start by changing the formatting of the paragraph that is already styled, for example Heading1: change the font size, space before, text color, etc. Now you'll update this style from your already formatted paragraph.
- In Word 2010, right click on the text line and choose Styles and Update style name to match selection.

- In newer versions of Word, after clicking in the paragraph, right-click in the styles gallery on the ribbon Home, and choose Update style name to match selection.
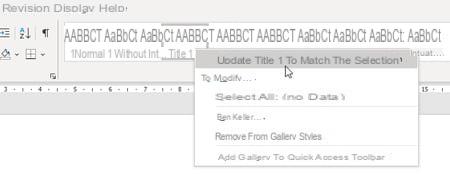
- This method is faster but be careful, in this case the modification only concerns the open document. You will need to right-click on the name of the style in the gallery, choose Edit then tick the box New documents based on this template to make it final.
How to create a new style in Word?
If the predefined styles aren't enough for you, create your own.
- Right click on the "manually" formatted paragraph in your document.
- Choose Styles and Save selection as a new quick style (Or on Create a style, depending on the version of Word).
- Enter a name for your style in the dialog that appears. Once again, choose a name that is descriptive. The button Edit displays the complete Edit Style dialog box (in case you want to edit any property of the style).
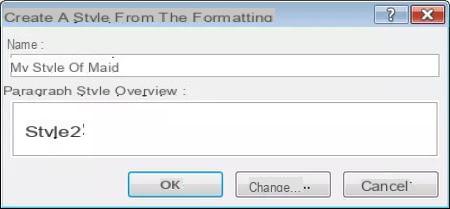
- To finish, click on OK.
How to save styles in a Word template?
If you have created a document with custom styles that you want to be able to reuse, you can save the document as a template.
- If you only want to save the styles and layout, delete the contents of the file by pressing the key combination Ctrl + A (Select all) then press the Delete.
- Click on the menu File, Save As.
- Select the target folder and enter the model name. We recommend that you create a folder specifically reserved for models. A folder named Templates in the My Documents folder, for example (let's keep it simple and logical).
- From the Save as type list, choose one of three template types (* .dotx, * .dotm, or * .dot).
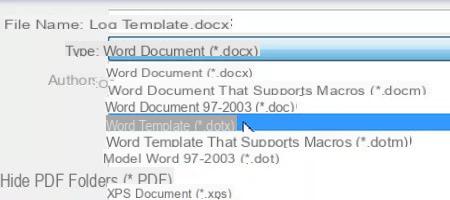
- To finish, click on Save.
- To know : a template doesn't just define a specific set of styles. It defines the basic structure of a document and contains document settings such as auto insertions, fonts, key assignments, macros, menus, layout, special formatting, and styles.
How to assign a keyboard shortcut to a style in Word?
Rather than having to search each time for your styles in the style gallery or in the styles window, you can assign them a keyboard shortcut. This way, while you type your text, you leave your hands on the keyboard without having to reach for the mouse.
- Right click on the selected style in the style gallery or in the Styles window then choose Edit.
- Click on the button Size in the lower left corner of the Edit Style dialog box and choose Shortcut key.
- The Customize Keyboard dialog box opens with the name of the style in the Commands box and the mouse pointer in the box. New hotkey.
- Directly execute your keyboard shortcut: hold down one of the keys Ctrl ou Other then you press one or two more keys in a row.
- The shortcut is displayed in the New shortcut key field:
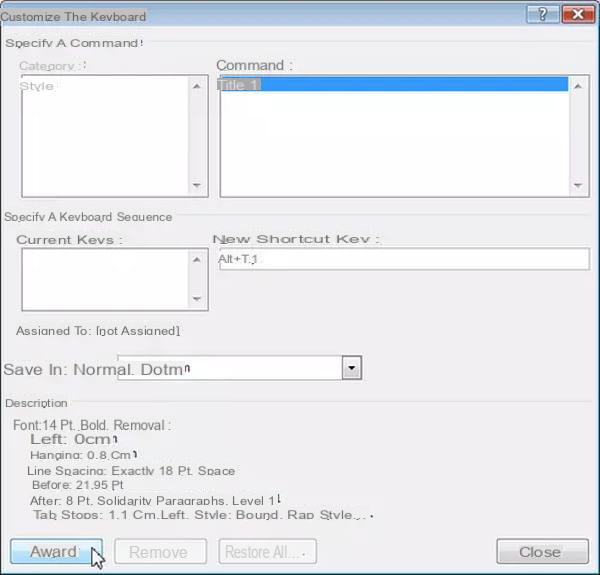
- Choose your keyboard shortcuts carefully if you want them to be easy to remember. If you forget them, you won't use them! Since most standard Word shortcuts are associated with the Ctrl key, choose the Alt key for yours instead. Then choose keys related to the style. For example, you could assign the shortcut Alt + T + 1 to the Heading 1 style, the shortcut Alt + T + 2 to the Heading 2 style, the shortcut Alt + L + P to the Bulleted List style, etc.
- Finish by clicking on Attribute.
- To apply the style, simply click in the paragraph you want to format and then press the keyboard shortcut key combination.
How do I use Word's picture styles?
Picture styles are a collection of different combinations of picture frames, perspectives, and effects. By applying a style to it, the most banal image takes on a new dimension.
- Click on the image to select it.
- On the ribbon Picture Tools> Format ( Image format, depending on the version of Word), click on the triangle in the lower right corner of the style gallery to display all the predefined styles:
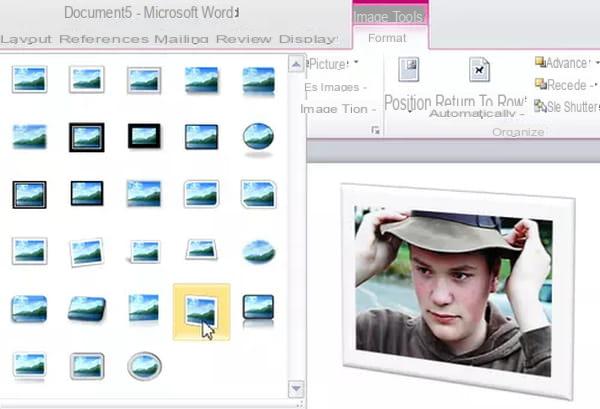
- Drag the mouse pointer over the thumbnails and observe the effect on the image. Click on the chosen thumbnail to apply the effect. That's all, and the result is truly amazing!
-
If no predefined style suits you, you can create the image border of your choice by clicking on Image edge then choose an effect by clicking on Effects of images.
-
The last option in the Image Styles group, titled Image layout, transforms the selected image into a SmartArt graphic.
The original text of this practical sheet is taken from "Everything to use Word 2010 well" (Christine EBERHARDT, Collection Idroid.com, Dunod, 2010)


