Preliminary information
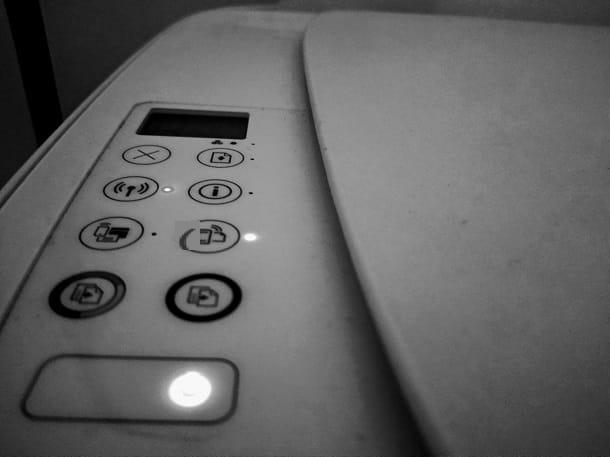
Before showing you all the steps to take for connect a printer to the network, it is good to make some important clarifications regarding the ways in which this can happen.
In the current state of things, there are at least two different systems to obtain the desired result: the first is to use the connectivity options available on the printer. So, if you have a printer model compatible with Wi-Fi or Ethernet connections, you can connect it “directly” to your home network and make it available on all connected devices.
If, on the other hand, you have a printer that does not have integrated connectivity, you can still make it available within the local network, by making the computer to which it is connected act as a print server.
The path you have to take, as it is easy to guess, strongly depends on the printer model in your possession: therefore try to identify the procedure that you think is most suitable, depending on the characteristics of the device in question. Generally, the type of connection supported by the printers is clearly indicated on the sales package of the same and in the information booklet supplied. Sometimes you will also find a special label stuck on the front of the printer, indicating the type of connection supported.
Finally, before moving on, make sure you have configured your network correctly, to ensure that all computers and other devices you intend to print from are connected to the same network. If you do not know how to do it or if you want to check that you have configured everything in the best way, consult my guide on how to wire a LAN network or the one on how to connect to a wireless network.
How to connect printer in LAN network
Having made the necessary clarifications above, the time has come to take action and to explain to you, in practice, how to connect printer in LAN network. In this regard, you can establish the connection in two different ways: via WIFI network, if your printer has such connectivity, or by employing with Ethernet / USB cable and establishing the connection directly with the router. Find everything explained below.
How to connect printer in wireless network
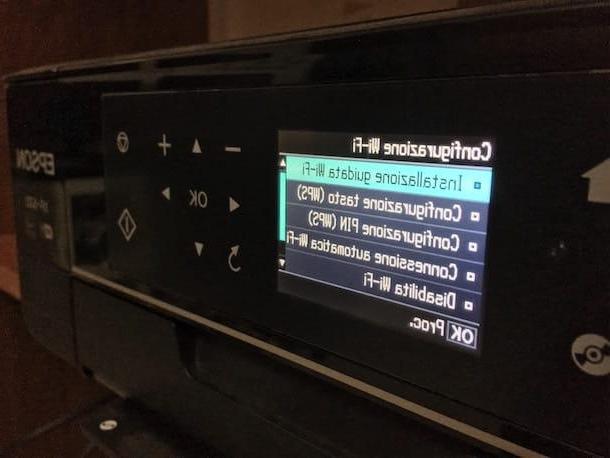
We start by printers with Wi-Fi support. If your printer is equipped with LCD screen and physical configuration buttons, establishing the connection to the network is extremely simple: to start, press the button menu / configuration located on the printer, or touch the appropriate button on the screen, if it is a touch type.
Once this is done, access the section relating to settings, reach the area dedicated to network configuration and choose you want to connect via Wi-Fi. At this point, all you have to do is choose the network to which you can connect among those detected and, when requested, enter the access key.
If necessary, respond in the affirmative to messages relating to the acceptance of terms of use of the device and download any updates available. However, please note that depending on your printer model, the names of the menu items may vary.
If, on the other hand, your printer does not have a screen, you can try to establish the connection to the router using the technology WPS, which allows two devices to be connected together by pressing a single button. Then, locate the appropriate button on the front of the printer (identified by an icon in the shape of curved arrows of opposite direction) and, within two minutes, press the same button on the router: Once the connection is complete, a sheet indicating it should be printed automatically network status.
If not even WPS is right for you, you will necessarily have to configure the printer using the appropriate one management software to be installed on your computer or via aapp for smartphone and tablet. For example, in the case of HP printers, you need to use the application HP Smart, which is available for computers with Windows 10, Mac, for Android devices (downloadable from the Play Store and from alternative stores) and for iPhone and iPad.
Generally speaking, what you need to do is connect to the Internet site of the printer manufacturer, go to the Support page dedicated to the device in your possession and download the necessary drivers and configuration software using the section Driver / Utility. If you run into any problems, you can Google phrases like configure wireless printer [printer brand and model], in order to obtain precise indications on what to do.
However, I recommend that you download the configuration software and drivers only from the manufacturer's website; otherwise you may run into malware.
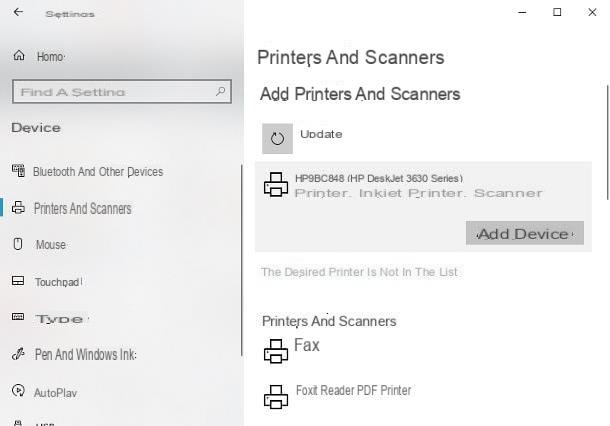
However, after connecting the printer to the Wi-Fi network, you can configure it and use it from the computers connected to the network. To do this, follow the procedure that best suits the operating system you are using.
- Windows 10 - apri il Start menuby clicking on the button in the shape of pennant located at the bottom left, press on the symbol ofgear and, having reached the panel of the settings, reach the sections devices e Printers and scanners. Infine, click your button [+] placed next to the item Add a printer or scanner, wait for the name of the printer appears on the screen, click on it and then on the button Add device, to finalize everything.
- Windows 8.1 / Windows 7 - recalls the Control Panel from the menu Home, go to the sections Hardware and Sound> Devices and Printers, click on the buttons Add printer e Add a network, wireless or Bluetooth printer and wait for the name device appears on the screen. When this happens, click on it, press the button NEXT, select i driver to use from the list that appears later and click on the button several times NEXT, to complete it all.
- MacOS - recati nelle System preference, by clicking on thegear which resides in the bar Dockclicca sull'icona Printers and scanners e premium pulsating [+] resident in the lower left. Once in the new window, select the tab Default, make sure the name of the printer appears among the proposed results and, after clicking on the latter, press the button Add.
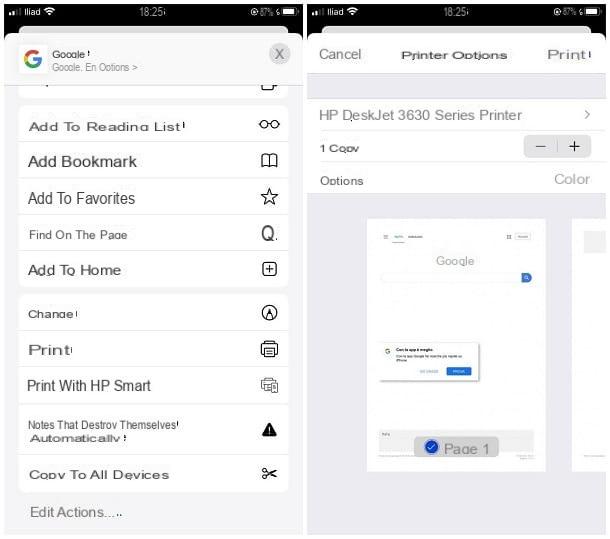
Su smartphones and tablets, however, things are slightly different: unless you have a network printer that supports Wi-Fi Direct (for Android devices) or compatible with the protocol AirPrint (for Apple devices), you must necessarily use the app or the mobile print driver made available by the manufacturer, in order to use it.
In detail, if the printing device supports the technology Wi-Fi Direct and the smartphone or tablet to print from has an operating system Android, you must enable the aforementioned network technology on the printer, then connect to the Wi-Fi network generated by the latter (generally called [printer name] _WiFi) and use the function Print placed in sharing menu of Android, to stamp your document on paper.
As for printers AirPrint, the speech is even simpler: if you use a iPhone or iPad, simply connect it to the same wireless network that the printer is using and invoke the function Print of sharing menu on iOS / iPadOS.
In all other cases, as I explained earlier, an application is required that acts as an “intermediary” between the device and the printer; Unfortunately, in cases like this, it is not possible for me to give you specific details about your printing device, as each manufacturer has a different app.
However, if you have an HP, Epson or Brother branded printer, my guides on how to print from your mobile to your HP printer, how to install an Epson Wi-Fi printer on your mobile, and how to install a Brother Wi-Fi printer on your mobile might be extremely helpful. phone.
In case of problems during the configuration of the wireless printer, both during the configuration phase and during its use, I invite you to read my specific tutorial on how to install a Wi-Fi printer, in which I have dealt with the topic in great detail. details.
How to connect printer to network via router
If you don't have a printer with Wi-Fi connectivity but a port only Ethernet, the configuration of the same is even easier: get a Ethernet cable, connect one end of it to the port of the same name on the back of the router, and the other to the same port on the printer.
After a few seconds, the connection should complete and, on the printer screen, you should see a message indicating successful connection to the network. If you have a printer without a screen, a summary page showing the status of the network should automatically print.
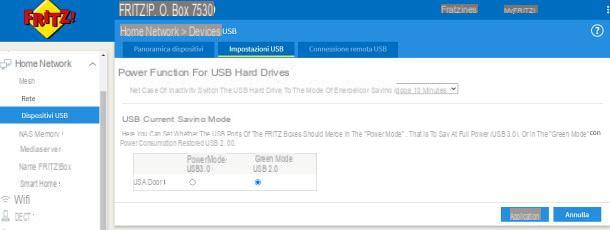
As for printers with connectivity only USB, on the other hand, things are slightly more complicated: in this case, the feasibility of the connection strictly depends on the router in use, as the latter must have standard USB ports and must support running the USB print server. This feature is usually clearly indicated in the information sheet of the network device.
If your router satisfies this last condition, then you can proceed with the configuration of the printer: unfortunately, it is not possible for me to provide you with precise indications on the steps to take, as they vary according to the model of router in your possession.
Generally, what you need to do is access the administrative panel of the router, enter the section dedicated to home network, locate the section dedicated to USB devices and enable the option dedicated to USB printer or, again, al USB print server. Once this step is completed, all you have to do is connect the devices involved with each other, via cable.
Regardless of the mode chosen, after completing the connection between the router and the printer, you can configure and use the latter on all devices connected to the same network (but also to the Wi-Fi network generated by the same router) by following the instructions that I provided you in the previous section of this chapter.
How to set up printer on the network

If your printer does not have network services but only a port USB and the router does not offer support for printing in this mode, or if you are using a printer connected to your computer via an interface LPT, can configure printer on the network transforming the PC to which it is connected into a real one print server.
Doing so is really simple: just share the printer with other network users and proceed with the installation of the latter on the other computers that need to use it. To use the shared printer, the computer to which it is connected must be turned on and connected to the network.
Before proceeding, make sure that the printing device you are interested in has been connected to the PC e correctly configured, after installing the appropriate drivers. If you haven't done this yet, you can cope with it by following the steps I showed you in my guide on how to install a printer.
How to connect printer to Windows 10 network
If the computer to which the printer is connected is running the operating system Windows 10, proceed as follows: First, if you are connected to the Internet via Wi-Fi and the connection is secure, move the network you are connected to to the category of private networks.
To do this, click on the symbol of network (I cheer with him where), resident near the clock, presses on the voice Property below the name of the Wi-Fi network you are connected to and put the check mark next to the item Private, located in the next window. If necessary, reply affirmatively to the warning message that appears on the screen.
Now, you can enable non-password protected file and printer sharing for private networks. So, open the Start menu, type in the words control panel and start this utility by clicking on the first result received.
Once this is done, go to the sections Network and Internet> Network and Sharing Centerclick sulla voce Modify impostazioni di condivisione Avanzate (located on the left), expand the profile Privateby clicking on down arrow corresponding to it, and put the check mark next to the boxes Enable network discovery, Activate the automatic configuration of the device connessi alla rete e Enable file and printer sharing.
Next, expand the profile Tutte retired him and, to disable access with password protection, put the check mark next to the item Disable password protected sharing. To save the changes made, click on the button Save Changes, located at the bottom.
At this point, the time has finally come to share the printer on the network: return to the Home page of the Control Panel by clicking several times on the up arrow, reach the sections Hardware and sound e Devices and printers, right click on the name of the printer you want to share and click on the item Printer properties, located in the menu that appears on the screen.
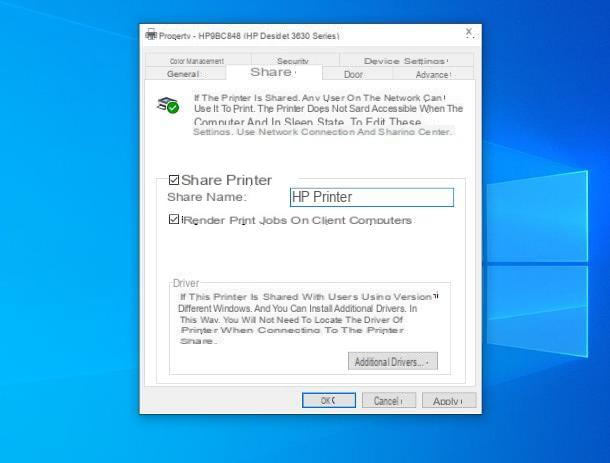
Finally, go to the tab sharing, put the check mark next to the item Share the printer, assign a name to the device and click on the button Apply, to confirm everything.
To add the printer you just shared, follow the guidelines that best suit your operating system.
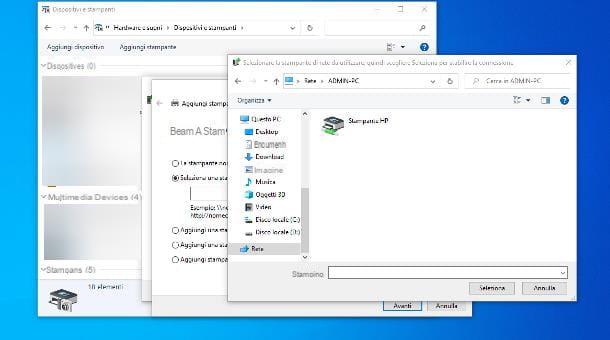
- Windows - apri il Control Panel, reach the sections Hardware and sound e Devices and printersclick on your button Add printer and then on the voice The printer I want is not listed. Now, put the check mark next to the wording Select a shared printer by nameclick on your button Sfoglia ... placed next to the box below and then on the item Network, located on the left side of the window that opens. We're almost there: now double-click the PC name which acts as a server and then on the name of the shared printer, click the button NEXT and wait for Windows to connect to the device and install its drivers if necessary. Finally, choose whether or not to set the printer as default and click on the button end.
- MacOS - apri le System preference by clicking on thegear placed on the screen Dock, access the section dedicated to Printersclick on your button [+] located at the bottom and select the tab Windows, attached to the next window. Then click on the name of the work group (With art. Workgroup), then on server name of the press and, finally, on that of the printer, then check that inside the box Use the correct driver is specified (otherwise enter it yourself) e add the new printer by clicking on the button located at the bottom.
How to connect printer on Mac network
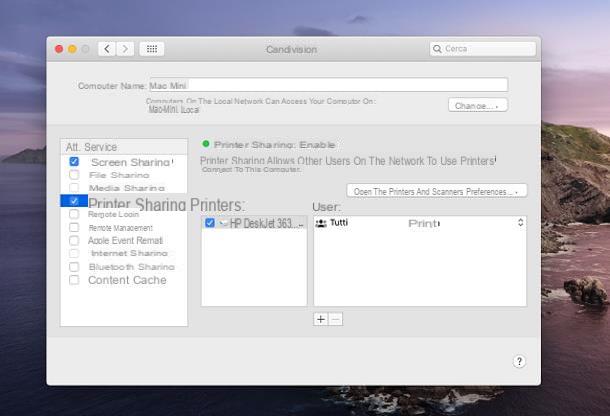
Share a network printer on Mac it's even easier! First, go to the System preference by clicking on thegear placed in the bar Dock, fai clic sull'icona della sharing and apponi il segno di spunta accanto alla voce Printer sharing, which resides on the left. Now, check the box related to name of the printer to be shared and make sure that, inside the box users, the options are present All e Print.
Now, to add the shared printer on a computer equipped with Windows 10, agreed Settings system by clicking on the icon in the shape ofgear placed in the menu Home and reach the sections devices e Printers and scanners.
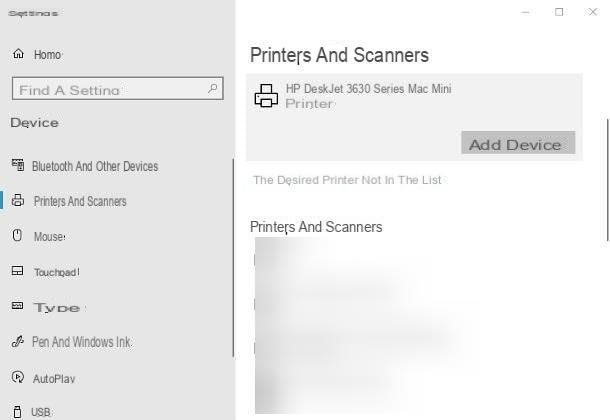
At this point, click on your button [+] Add printers and scanners and wait patiently for the printer configured on the Mac (indicating the words printer name @ [Mac name]) appears on the screen. When this happens, click on his name and finally press the button Add device.
Su Mac, on the other hand, you can easily add the printer by clicking on the section Printer of the System preference e clicking on your button [+] placed at the bottom.
If you have problems in detecting the print server, you may have to configure the printer by manually entering the IP address of the aforementioned computer: in this regard, I recommend that you carefully read my guide on how to install a printer via IP address, in which I have dealt with the subject in depth.
How to connect printer to network


