Summary
- > Who can see your browsing history?
- > Why enable Private Browsing mode on your iPhone?
- > Enable Private Browsing on iPhone or iPad
- > Use a VPN for more privacy
It's no surprise that you want to keep your internet activities private. Moreover, most Internet users prefer that their history remains secret for many reasons: the organization of a surprise birthday, medical information, job searches...
If this is your case, you can delete, one by one, each browsing session if you wish. However, there is an even more efficient and faster solution: use private browsing.
In this article, we'll show you how to enable and use private browsing on your iPhone or iPad.
Who can see your browsing history?
In general, when you browse the web from your phone or tablet you leave traces.
If a very curious friend were to borrow your phone, he could therefore have access to the details of your Internet exploration and all the content on your iPhone. Moreover, do not hesitate to secure your applications at the same time.

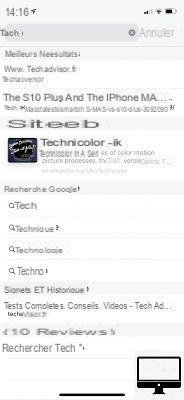
Your search data is also accessible through automatic completion (autocompletion). This function allows search engines to complete your query as it is entered, based on keywords used in the past.
As an example, imagine that same friend types the name of a website into the search bar.
If it shares the same first letters as another site, which you are used to browsing, then the latter will appear in its suggestions, and this can quickly become embarrassing.

The Safari browser syncs bookmarks and frequently visited site data between all your iOS devices. Specifically, if your MacBook and your iPhone share the same account, then the searches performed on your phone will be displayed on your computer.
Your web activity can be disclosed in many other ways. In theory, your data entered during browsing is used for effective advertising targeting, but it is also possible to come across unhealthy ads.
To block ads on your iPhone, take a look at our tips.
Why enable private browsing mode on your iPhone?
Apple has included incognito mode in its iPhones and iPads since the debut of iOS 5, so if you prefer to keep your internet searches private on the web, then go ahead and use it.
As long as this mode is running, your iPhone or iPad will not remember any traces of your visits.
Enable Private Browsing on iPhone or iPad
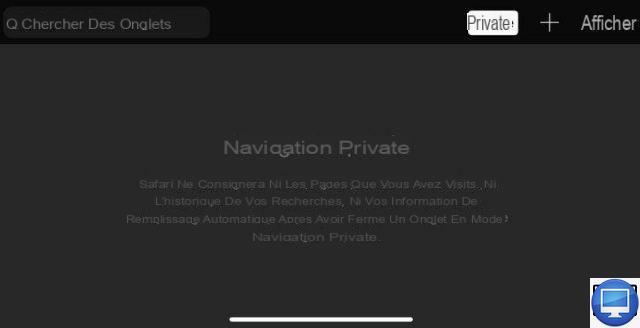
To enable Private Browsing on your iOS, first open Safari. Then, at the bottom right of your screen, tap thepages icon (two overlapping squares), once the window opens, press Private. When you switch to private browsing, the interface darkens by adopting a blacker shade.

You are warned that Safari will not remember the pages visited or any autocompletion information.
All the tabs you had already opened will disappear, you can open new ones and surf the web normally, but this time in complete privacy.
However, your public browsing windows are still open so you don't lose them. To return to it, press thepages icon, And then Private.

Use a VPN for more privacy
It is important to note that even if you don't save any browsing history in private mode, your internet service provider is still able to see the websites browsed.
If you want to be completely anonymous on the net, know that you can always use a VPN such as NordVPN or ExpressVPN. These create a virtual private network that prevents your activities from being tracked.
Discover our selection of the best VPNs for your iPhone and iPad.


