Summary
- > Check your cables
- > Change your preferences
- > Reformat your hard drive
- > Change the format of your disc
When you plug an external hard drive into your Mac, it should instantly appear not only on the desktop and in the Finder utility. Nevertheless, it also sometimes happens that your macOS does not detect it.
In this case, what should be done? Does that mean it is faulty?
It is indeed possible, or it may simply be prone to a bug, particularly because of an incompatible file format or a faulty cable.
There are some effective solutions to counter these potential malfunctions.
In this tutorial, we explain how to repair your external hard drive.
Check your cables
One of the main reasons why external drives are not recognized on some computers is lack of power.
If your SSD has a USB-A cable, then we advise you to check that it has enough power, especially if you have an older and less capable Mac.
It is also important to ensure that the external hard drive used does not require an AC power source to be effective.
Change your preferences
Usually, an SSD comes on by default on most Macs, but it's always worth checking before moving on to more complex fixes.
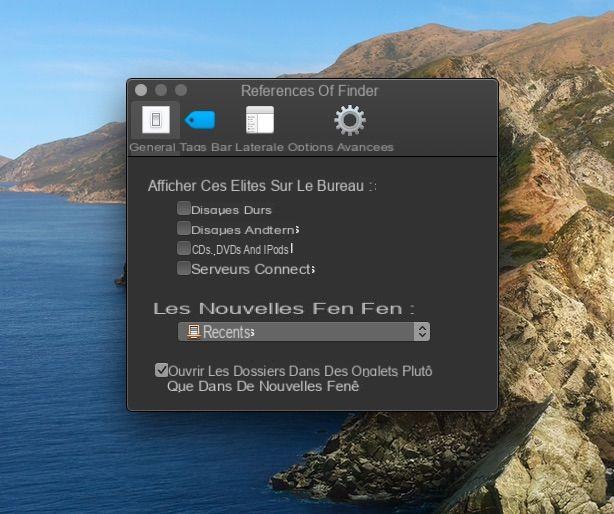
- Open Finder.
- Click on Finder in the menu bar.
- Click on Preferences.
- In the tab General, make sure the box External disks is checked.

It's the case ? Then there may be a problem with your Mac. That's why we recommend trying to plug your SSD into another device. If it installs successfully, then it is indeed a problem specific to your Mac.
On the other hand, if it is still unable to display, the problem could be related to the file format.
To check this, try accessing the external drive from a Windows PC.
Reformat your hard drive
Your external hard drive is not recognized on a Mac or a PC? There is a high chance that it has suffered digital damage thus rendering the disc unreadable. Depending on the level of corruption, do not hesitate to use Apple's utility to try to repair it.
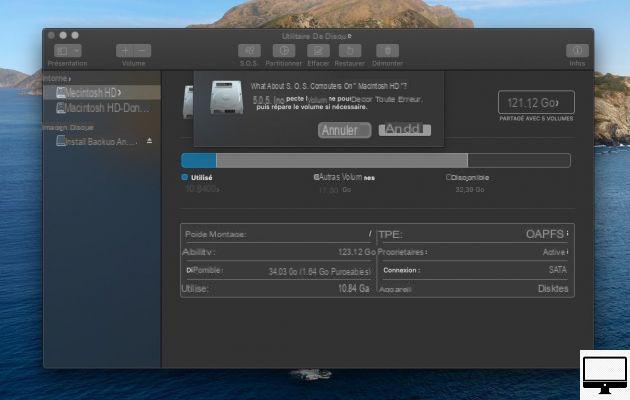
- Open the app Disk Utility.
- Select your external drive from the list on the left of the app.
If it doesn't appear here, then you'll need to try another of our fixes. - Click on ascend.
- Select the icon SOS to check the drive for errors.
- Click on perform.
- Si Utility de disk finds errors, you will be alerted and prompted to run Disk Repair.

Once fixed, you should be able to access your external drive normally.
Change your disk format
If your external drive shows up when plugged into a Windows, it may mean that the drive formatting is not compatible with macOS.
For users unfamiliar with data formats, there are several popular options:
- NTFS : format developed by Microsoft for Windows PCs, incompatible with Mac.
- macOS Extended : pre-Sierra format for Mac, not compatible with PC.
- APFS : Apple File System, file format introduced in MacOS Sierra incompatible with PC.
- FAT / FAT32 : old format limited to a maximum size of 4 GB, but compatible with PC, Mac and Linux.
- exFAT : Updated version of FAT32 without file limit, compatible with PC, Mac and Linux.
The good news is that changing the format is easy, the bad news is that it will completely erase your drive and therefore all of your stored data. Therefore, we therefore recommend transferring the files upstream.
When you are ready to reformat the drive, follow these steps:
- Connect your external drive to your Mac.
- Open Disk Utility and select the external drive from the list on the left.
- Click on Clear.
- Enter a new disc name and select the new format.
For discs on PC and Mac, we recommend you exFAT, but if you are exclusively under MacOS, then it will be macOS Extended (Journaled). - Click Erase again to confirm and start the reformatting process.
Although it won't help you in your current situation, there is a simple tip you can follow to avoid data corruption: always eject your drive before unplugging it.


